No sugar, no starch, naturally sweet, light, creamy, and beginner-friendly
If you are looking for a lighter cheesecake that still feels elegant, satisfying, and truly homemade, this recipe is one of the best places to start. It is soft, creamy, gently sweet, and full of fresh strawberry flavor. There is no starch, no refined sugar, and no complicated technique — just a handful of simple ingredients working together beautifully.
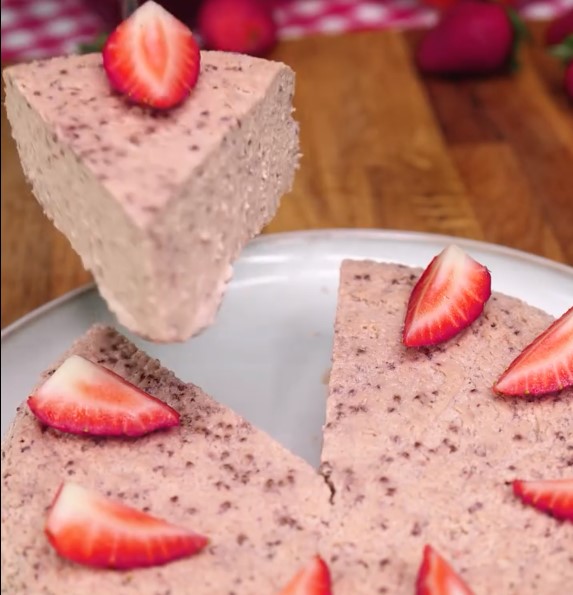
What makes this recipe special is its texture. It is not heavy like a classic baked cheesecake, and it is not airy like a sponge cake. Instead, it lands somewhere in between: silky, tender, slightly custardy, and incredibly fresh.
And if you have never baked cheesecake before, do not worry. I will guide you through it exactly the way I would teach a beginner standing next to me in the kitchen.
🍓 Enjoy A Strawberry Cheesecake That Feels Fresh, Light And Naturally Sweet Without Any Added Sugar
Why You’ll Love This Recipe
- Naturally sweetened to your taste
- No starch or flour needed
- Light yet creamy texture
- Full of real strawberry flavor
- Simple ingredients and easy preparation
- Perfect for breakfast, dessert, or a lighter sweet snack
✨ Savour A Slice Where Creamy Softness Meets Bright Strawberry Aroma In Perfect Harmony
Before You Start: Important Chef’s Advice
This recipe is simple, but there is one thing you must understand before you begin: strawberries hold a lot of water. That means your success depends on how smoothly you blend the filling and how gently you bake it.
Do not rush. A calm, even batter gives you a smooth cheesecake. A hot oven and rough handling can give you cracks or a watery texture.
The good news is that even if it looks rustic, it will still taste wonderful.
🔥 Choose A Dessert That Delivers Pure Cheesecake Pleasure With Only Five Simple Ingredients
Step-by-Step Instructions
Step 1: Bring the chilled ingredients closer to room temperature
Take the cream cheese, yogurt, and eggs out of the refrigerator about 20–30 minutes before you start, if possible.
This is one of the simplest secrets to a smooth cheesecake. Cold ingredients do not blend as easily, and they can leave little lumps in the batter.
Chef’s secret:
If you forgot to do this, do not panic. Place the eggs in a bowl of warm water for 5–10 minutes, and let the cream cheese sit near the oven while it preheats.
Step 2: Preheat the oven and prepare the pan
Preheat your oven to 385°F (195°C).
Line your baking pan with parchment paper or lightly grease it. If using a round cake pan, line the bottom and lightly grease the sides for easier release.
Best pan size:
A 7-inch round pan works very well for this amount of batter. A small rectangular dish will also work.
Chef’s secret:
If your pan is very shallow, place it on a baking tray so it is easier to move in and out of the oven without spilling.
🍰 Let Each Bite Bring You A Smooth, Velvety Texture Lifted By Gentle Berry Freshness
Step 3: Prepare the strawberries properly
Wash the strawberries well, remove the green tops, and pat them dry.
This step matters more than beginners think. If the berries are dripping wet, they add extra moisture to the cheesecake, which can make the texture too loose.
Cut the strawberries into halves or quarters so they blend more easily.
Chef’s secret:
Taste one strawberry before using the whole batch. If your berries are very sweet, you will need less agave. If they are tart, you may want a little more.
Step 4: Blend the strawberries first
Place the strawberries into a blender or food processor and blend until smooth.
You can leave the puree as it is for a more rustic cheesecake, or pass it through a fine mesh sieve if you want a smoother, more elegant texture without seeds.
For beginners:
If you want the cleanest and creamiest final result, straining the puree is worth the extra minute.
Chef’s secret:
If your strawberries are especially juicy, you can let the puree sit in a sieve for 5 minutes to remove a little extra liquid. This helps create a more stable cheesecake.
🍓 Make This Cheesecake Your Go To Treat For Clean, Effortless And Beautifully Balanced Sweetness
Step 5: Blend the creamy base
Add the yogurt, cream cheese, eggs, vanilla extract, and agave syrup to the blender with the strawberry puree.
Blend just until the mixture becomes smooth, creamy, and fully combined.
Do not whip the mixture aggressively for too long. You are not trying to beat air into it — you are trying to create a silky batter.
What the batter should look like:
- smooth
- pourable
- creamy
- evenly pink
Chef’s secret:
Overmixing can add too much air, and too much air can make the cheesecake puff too much in the oven and then sink dramatically as it cools.
Step 6: Taste and adjust the sweetness
Before pouring the batter into the pan, taste it and adjust the agave syrup.
This is the advantage of naturally sweetened desserts: you control the flavor. Strawberries vary in sweetness, yogurt can be more or less tangy, and everyone likes dessert a little differently.
I recommend starting with 1 to 2 tablespoons agave syrup, then adding more only if needed.
Chef’s secret:
Do not make it too sweet. A chilled cheesecake always tastes slightly less sweet after baking, but this dessert is meant to feel fresh and light, not sugary and heavy.
✨ Appreciate How Natural Ingredients Create A Dessert That Tastes Both Elegant And Comforting
Step 7: Pour the batter into the prepared pan
Pour the cheesecake batter into your lined or greased pan.
Use a spatula to smooth the top.
Now gently tap the pan on the counter once or twice. This helps release larger air bubbles and gives you a smoother finish.
Beginner tip:
Do not slam the pan hard. Gentle taps are enough.
Step 8: Bake carefully
Place the cheesecake in the preheated oven and bake at 385°F (195°C) for 40 minutes.
The cheesecake is ready when:
- the edges look set
- the center still has a slight wobble
- the top looks lightly puffed and matte rather than wet
Do not expect it to look completely firm in the center while still in the oven. Cheesecake continues to set as it cools.
Chef’s secret:
The biggest beginner mistake is overbaking. If you bake until the center is fully hard in the oven, the final texture may become rubbery instead of creamy.
🔥 Serve It Chilled And Enjoy A Firm, Silky Slice With A Refreshing Strawberry Finish
Step 9: Cool it slowly
Once baked, remove the cheesecake from the oven and let it cool in the pan at room temperature for about 30–40 minutes.
After that, transfer it to the refrigerator and chill for at least 3–4 hours, or preferably overnight.
This is not optional if you want the best texture. Warm cheesecake is too delicate. Chilled cheesecake becomes smoother, cleaner to slice, and much more flavorful.
Chef’s secret:
The flavor deepens after chilling. What tastes light and pleasant when warm becomes much creamier and more balanced after a few hours in the fridge.
Step 10: Slice and serve
When fully chilled, remove the cheesecake from the pan and slice with a warm knife.
To get neat slices:
- Dip the knife in hot water
- Wipe it dry
- Slice
- Clean the blade between cuts
Serve as is, or decorate with:
- fresh sliced strawberries
- a spoon of yogurt
- a few mint leaves
- a light drizzle of agave
🍰 Keep This Recipe Close For Days When You Want Something Sweet Yet Light And Wholesome
Yield
6 servings
Prep Time, Cook Time, Total Time
- Prep Time: 15 minutes
- Cook Time: 40 minutes
- Cooling Time: 4 hours
- Total Time: about 4 hours 55 minutes
🍓 Enjoy A Cheesecake That Combines Creaminess, Freshness And A Hint Of Natural Berry Tartness
Nutrition (Approximate, Per Serving)
Based on 6 servings, with a modest amount of agave syrup
- Calories: 135–155
- Protein: 7 g
- Fat: 7 g
- Carbohydrates: 10–13 g
- Sugar: 8–11 g
- Fiber: 1 g
Nutrition will vary depending on the type of yogurt, cream cheese, and amount of agave used.
✨ Let Each Forkful Bring You Calm, Comfort And A Touch Of Summer Brightness
Chef’s Best Tips
1. Use ripe, flavorful strawberries
This recipe depends heavily on the fruit, so bland strawberries will give you a bland cheesecake. Use ripe, fragrant berries for the best natural sweetness.
2. Full-fat ingredients give the best texture
If possible, use full-fat yogurt and regular cream cheese. Low-fat versions work, but the cheesecake will be less creamy.
3. Do not overblend after adding the eggs
Blend only until smooth. Too much air in the batter can make the cheesecake rise and fall too much.
🔥 Choose This Strawberry Cheesecake When You Crave Something Creamy Without Feeling Heavy
4. Do not overbake
Remember: the center should still jiggle slightly when you remove it from the oven. That is exactly what you want.
5. Chill before serving
This dessert improves dramatically after chilling. The texture sets, the flavor rounds out, and slicing becomes much easier.
6. Strain the strawberry puree for a silkier result
If you want a more refined cheesecake, remove the seeds and excess pulp with a sieve.
7. Taste before baking
Because fruit sweetness changes from batch to batch, always adjust the agave to your liking before the cheesecake goes into the oven.
🍰 Share It With Friends And Watch The Light, Sugar Free Texture Impress Instantly
Optional Variations
Strawberry Vanilla Cheesecake
Add a little extra vanilla for a softer, more dessert-like aroma.
Berry Mix Version
Replace part of the strawberries with raspberries or blueberries for a more complex berry flavor.
Tangier Cheesecake
Use Greek yogurt for a thicker, slightly tangier result.
More Elegant Finish
Top the chilled cheesecake with thinly sliced fresh strawberries right before serving.
🍓 Pair It With Fresh Strawberries Or A Drizzle Of Purée For A Café Style Finish
Storage
Store the cheesecake in the refrigerator, covered, for up to 3 days.
For the best texture, keep it chilled until serving.
I do not recommend freezing it unless necessary. Because of the high fruit and dairy content, freezing may slightly affect the smooth texture after thawing.
✨ Enjoy A Recipe That Turns Five Simple Ingredients Into A Soft, Dreamy Cheesecake
FAQ
Can I use frozen strawberries?
Yes, but thaw them first and drain excess liquid well. Frozen berries release more water, which can make the cheesecake softer.
Can I use Greek yogurt instead of regular yogurt?
Yes. Greek yogurt works very well and gives a thicker, slightly richer texture.
Can I replace agave syrup?
Yes. You can use honey, maple syrup, or another liquid sweetener, but the flavor will change slightly.
Why is my cheesecake still jiggly in the center?
That is normal right after baking. It will continue to set as it cools and chills in the refrigerator.
🔥 Make It Part Of Your Weekly Ritual For Light, Sweet And Effortlessly Satisfying Moments
Why did my cheesecake crack?
Usually because it was overbaked, mixed too aggressively, or cooled too quickly. The good news is that cracks do not affect the taste.
Can I make it ahead of time?
Yes, and in fact, you should. This cheesecake is best made several hours ahead or even the day before.
Can I make it sweeter?
Absolutely. Just increase the agave syrup gradually and taste as you go before baking.
What is the texture like?
It is lighter than classic cheesecake, softer than a dense New York-style cheesecake, and slightly custardy with a creamy finish.
5-Ingredient Strawberry Cheesecake
Instructions
- Preheat oven to 385°F (195°C) and line or grease a small baking pan.
- Wash, hull, and dry the strawberries.
- Blend strawberries until smooth.
- Add yogurt, cream cheese, eggs, vanilla, and agave syrup. Blend until smooth and creamy.
- Pour the mixture into the prepared pan and smooth the top.
- Bake for 40 minutes, until the edges are set and the center is slightly jiggly.
- Cool at room temperature, then chill for at least 3–4 hours before slicing.
Notes
- Use ripe strawberries for the best flavor.
- Do not overbake; the center should still wobble slightly.
- Chill well before serving for the best texture.