If you think beans have no place in dessert, let me reassure you: when used correctly, they create one of the smoothest, fudgiest, most forgiving no-bake treats you can make. These sugar-free chocolate bean treats are naturally sweetened with dates, rich with cocoa, and wonderfully simple even for a beginner. No oven, no complicated techniques, and no refined sugar.
The secret is balance: the beans give body, the dates bring natural sweetness and softness, the cocoa creates deep chocolate flavor, and a small pinch of salt makes everything taste fuller and more “dessert-like.” Once you understand the texture, this recipe becomes nearly impossible to mess up.
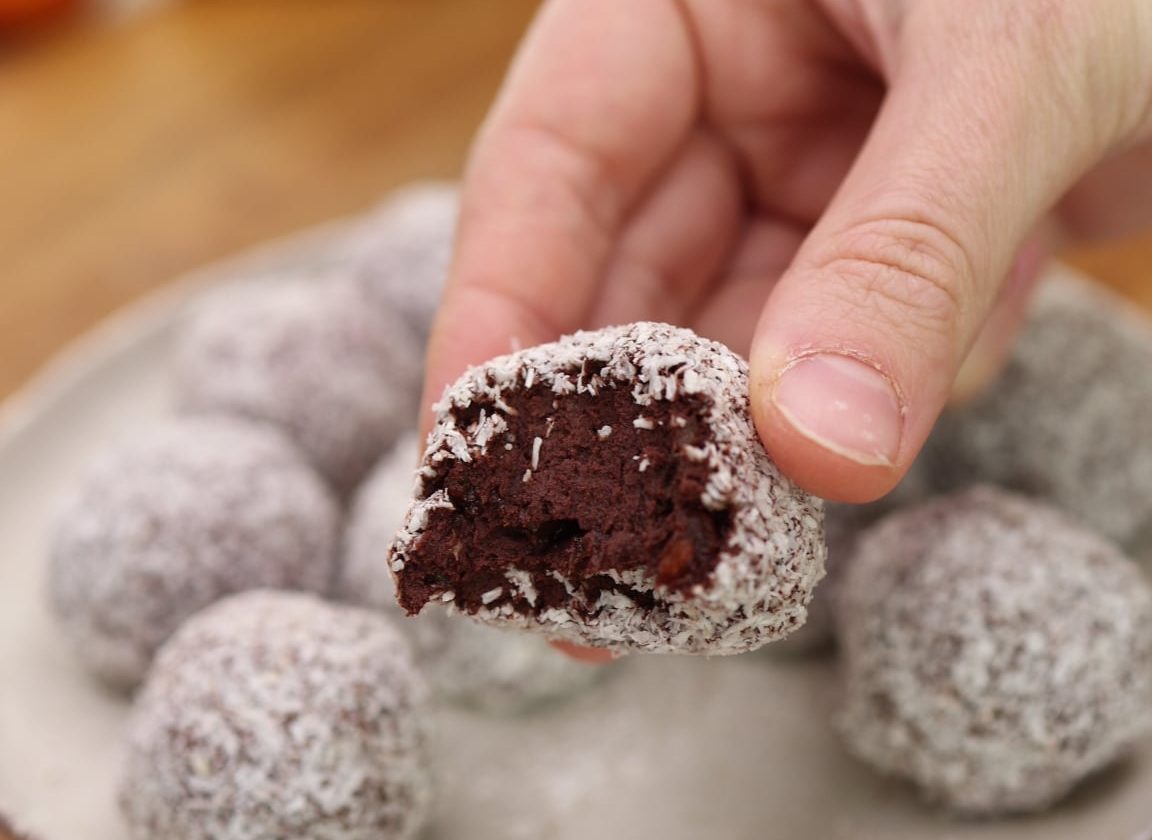
🍫 Enjoy Sugar Free Chocolate Bean Treats That Feel Rich, Smooth And Naturally Satisfying
Why You’ll Love This Recipe
- No-bake and beginner-friendly
- Naturally sweetened with dates
- No refined sugar
- Soft, truffle-like texture
- Made with just a few simple ingredients
- Easy to adjust if the mixture is too dry or too wet
- Beans: Use mild-flavored beans for the best dessert texture. White beans, cannellini beans, or chickpeas work especially well because their flavor is neutral and won’t overpower the chocolate.
- Dates: Soft dates are best. If your dates feel dry or firm, soak them in warm water for 5–10 minutes, then drain well before blending.
- Cocoa powder: Use unsweetened cocoa powder. A good-quality cocoa will give a deeper, richer chocolate flavor.
- Salt: Do not skip it. Even a tiny pinch sharpens the chocolate flavor and keeps the treats from tasting flat.
- Coconut flakes: These add texture, help prevent sticking, and make the treats look finished and elegant.
🌱 Savour A Clean Dessert Where Cocoa Depth Meets Gentle Bean Creaminess
Equipment
- Blender or food processor
- Fine sieve or colander
- Spoon or small cookie scoop
- Plate or tray
- Refrigerator-safe container
Chef’s Note on Equipment
A food processor is usually easier than a blender for thick mixtures like this. If you only have a blender, stop often and scrape down the sides.
✨ Choose A Treat That Delivers Chocolate Pleasure Without Any Added Sugar
Prep Time
- Prep time: 15 minutes
- Chilling time: 30–60 minutes
- Total time: About 45–75 minutes
Yield
- Makes: 10–14 small treats, depending on size
🔥 Let Each Bite Bring You Soft Sweetness Powered Only By Natural Ingredients
Step-by-Step Instructions
Step 1: Drain the beans very well
Open the can of beans and pour them into a sieve or colander. Rinse lightly if needed, then let them drain thoroughly.
Why this matters:
Excess moisture is the fastest way to end up with a mixture that is too loose and sticky. The beans should be moist, but not watery.
Chef’s secret:
After draining, spread the beans on a plate or clean kitchen towel and gently pat them dry. This small extra step gives you a much thicker, easier-to-shape mixture.
Step 2: Prepare the dates
Check that all dates are fully pitted. If they feel dry, soak them in warm water for 5–10 minutes, then drain them very well.
Why this matters:
Soft dates blend more easily and create a smooth, even texture. Dry dates can leave tiny bits in the mixture and make shaping harder.
Beginner tip:
If the dates are sticky and clump together, separate them with your fingers before adding them to the blender. This helps them blend faster.
🍫 Make These Bean Based Chocolate Treats Your Go To Healthy Indulgence
Step 3: Add everything to the blender or food processor
Place the drained beans, pitted dates, cocoa powder, and a pinch of salt into your blender or food processor.
Blend until the mixture becomes smooth and thick.
What you are looking for:
The final mixture should look like a dense chocolate paste. It should hold together when pressed between your fingers, but it should not feel runny.
Chef’s secret:
Do not rush this stage. Blend, stop, scrape down the sides, and blend again. Good texture comes from patience here.
Step 4: Adjust the texture carefully
If the mixture looks too dry or crumbly, add 1 teaspoon of water at a time, blending after each addition.
If the mixture becomes too wet or sticky, add a little extra cocoa powder, about 1 teaspoon at a time, until the texture firms up.
The ideal consistency:
Soft, smooth, and easy to shape. It should feel similar to truffle filling or thick cookie dough.
Important beginner rule:
Never add too much water at once. A single extra spoonful can turn the mixture from perfect to messy.
Chef’s trick:
If the mixture is too soft but you do not want to add more cocoa, chill it for 10–15 minutes before shaping. Cold mixture is always easier to handle.
🌱 Appreciate How Wholesome Ingredients Create A Dessert That Still Feels Luxurious
Step 5: Taste and adjust if needed
Before shaping, taste a tiny bit.
At this point you can adjust:
- More cocoa powder for a deeper chocolate flavor
- A tiny extra pinch of salt if the flavor tastes dull
- A little more date if you want it sweeter
Chef’s advice:
Flavor changes after chilling. The chocolate taste becomes more pronounced, so do not overcorrect too early.
Step 6: Shape the treats
Use a spoon, melon baller, or small cookie scoop to portion the mixture. Roll into small balls with your hands, or flatten slightly into little cakes if you prefer.
Beginner tip:
If the mixture sticks to your hands, lightly dampen your palms with water or chill the mixture first.
For cleaner, more even treats:
Use a small scoop so all pieces are the same size. This also makes the nutrition estimate more accurate.
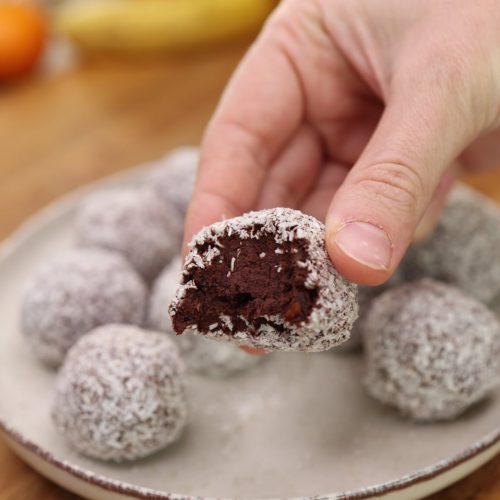
✨ Serve Them Chilled And Enjoy A Silky Texture With A Pure Cocoa Finish
Step 7: Coat with coconut flakes
Place the coconut flakes in a shallow bowl or plate. Roll each treat in the flakes until evenly coated.
Why this matters:
The coconut prevents sticking, adds a pleasant bite, and makes the treats look neat and professional.
Chef’s secret:
Press very gently while coating so the flakes adhere well without squashing the shape.
Step 8: Chill to set
Place the finished treats on a plate or tray and refrigerate until firm, about 30 to 60 minutes.
What chilling does:
It helps the texture settle, makes the treats easier to pick up, and allows the chocolate flavor to deepen.
Best serving texture:
Cool from the fridge, but not rock hard. Let them sit at room temperature for 3–5 minutes before serving if you want a softer bite.
🔥 Keep This Recipe Close For Evenings When You Want Something Sweet Yet Balanced
Nutrition (Approximate)
Per 1 treat, based on 12 pieces
- Calories: 60–70 kcal
- Carbohydrates: 10–11 g
- Protein: 2–3 g
- Fat: 1–2 g
- Fiber: 2–3 g
- Sugars: 4–5 g
Please note: Nutrition will vary depending on the type of beans, dates, cocoa powder, and amount of coconut used.
🍫 Enjoy A Treat That Proves Sugar Free Desserts Can Be Deeply Satisfying
Chef’s Best Tips
1. Dry beans make better treats
The better you drain the beans, the easier the shaping will be. Wet beans are the main reason this recipe turns sticky.
2. Soften dates if necessary
Soft dates blend into a creamy paste. Dry dates can leave lumps and make the mixture feel grainy.
3. Add liquid very slowly
If the mixture seems dry, add water carefully, one teaspoon at a time. There is a big difference between “just right” and “too wet.”
🌱 Let The Natural Bean Smoothness Replace Heavy Cream Without Losing Richness
4. Chill before shaping if the mixture feels soft
This is one of the easiest fixes. Ten to fifteen minutes in the fridge often solves the problem.
5. Use good cocoa powder
With so few ingredients, the cocoa flavor really matters. Better cocoa gives a richer and more satisfying result.
6. Taste before shaping
Always check the mixture before rolling. It is much easier to adjust sweetness or chocolate intensity at this stage.
7. Keep the treats small
Small portions taste more elegant and hold their shape better. Think “truffle size,” not “cookie size.”
✨ Choose These Treats When You Want A Dessert That Supports Your Wellness Goals
FAQ
Can you taste the beans?
Not strongly, if you use mild-flavored beans and enough cocoa. The chocolate and dates are the dominant flavors.
What kind of beans work best?
White beans, cannellini beans, and chickpeas are the best options because they have a mild taste and smooth texture.
What if my mixture is too dry?
Add water 1 teaspoon at a time and blend again after each addition.
What if my mixture is too wet?
Add a little more cocoa powder, or chill the mixture for 10–15 minutes before shaping.
🔥 Share Them With Friends And Watch Their Surprise At The Creamy Texture
Can I make these without coconut flakes?
Yes. You can leave them plain or coat them in extra cocoa powder, finely ground nuts, or seeds.
How should I store them?
Keep them in an airtight container in the refrigerator for up to 4–5 days.
Can I freeze them?
Yes. Freeze in a sealed container for up to 1 month. Let them thaw in the fridge or for a few minutes at room temperature before eating.
Are these treats very sweet?
They are mildly sweet and naturally sweetened with dates. For a sweeter result, add a few extra dates.
Do I need a food processor?
No, but it helps. A blender works too; just stop and scrape down the sides as needed.
🍫 Pair Them With Berries Or Nuts For A Beautifully Rounded Chocolate Moment
Sugar-Free Chocolate Bean Treats
Instructions
- Drain the beans very well.
- Add the beans, dates, cocoa powder, and salt to a blender or food processor.
- Blend until smooth and thick.
- If the mixture is too dry, add 1 teaspoon of water at a time.
- If it becomes too wet, add a little more cocoa powder.
- Shape into small balls or mini cakes.
- Roll in coconut flakes.
- Refrigerate for 30–60 minutes until firm.
Notes
- Pat the beans dry for a thicker mixture.
- Use soft dates for easier blending.
- Add water very slowly.
- Chill the mixture if it feels too sticky.