A soft, delicate, beautifully creamy cheesecake made with cottage cheese, cream cheese, and heavy cream. This is the kind of simple homemade dessert that looks modest at first glance, but once you taste it, you understand why people make it again and again. The texture is smooth, light, and tender, and the flavor is clean, milky, and comforting.
What I love about this recipe is that it is forgiving, beginner-friendly, and made with everyday ingredients. Even if you have never baked a cheesecake before, I will walk you through it step by step so you can get a lovely result the first time.
Introduction
This cheesecake has a gentler, lighter texture than a classic dense New York-style cheesecake. Cottage cheese gives it a fresh dairy flavor, while cream cheese adds richness and body. Heavy cream softens the texture, eggs help it set, and cornstarch stabilizes the batter so it bakes up silky instead of grainy.
You can make it with sugar for a classic dessert version, or reduce the sugar if you prefer a less sweet, more delicate cheesecake. It is especially good chilled, when the texture becomes smooth, creamy, and sliceable.
Optional for serving
- Fresh berries
- Powdered sugar
- Berry sauce
- Mint leaves
- A spoonful of sour cream or whipped cream
Equipment
- Blender or food processor
- Large mixing bowl
- Spatula
- Baking pan, lined with parchment
- Air fryer or oven
- Aluminum foil, if needed
Detailed Step-by-Step Recipe
Step 1. Prepare your ingredients properly
Before you begin, take the eggs, heavy cream, cream cheese, and cottage cheese out of the refrigerator for about 20–30 minutes if possible.
Why this matters
Cold ingredients do not blend as smoothly. Room-temperature dairy mixes faster and gives you a much silkier batter.
Chef’s advice
If you are short on time, do not worry. You can still make the recipe straight from the fridge, but blend a little longer and be extra careful to remove all lumps.
Step 2. Prepare the pan
Line your baking pan with parchment paper. Make sure the paper comes slightly up the sides so the cheesecake can be lifted out easily after chilling.
Why this matters
This cheesecake is delicate when warm. Parchment helps protect the shape and prevents sticking.
Beginner tip
Crumple the parchment paper lightly in your hands first, then flatten it out. It will fit the pan more easily.
Step 3. Combine all ingredients
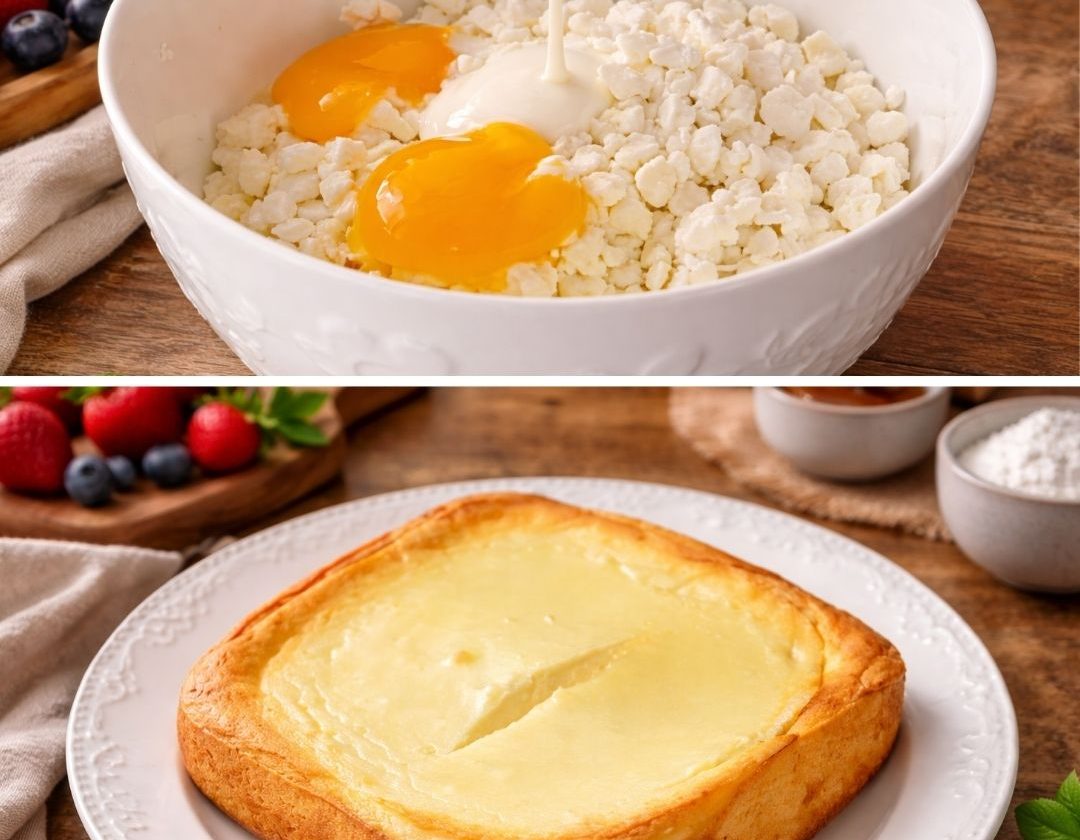
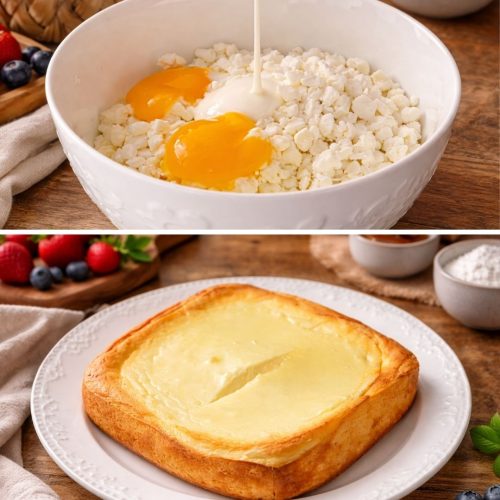
Add the cottage cheese, eggs, sugar if using, heavy cream, cream cheese, and cornstarch to a blender or food processor.
Blend until the mixture is completely smooth, creamy, and uniform.
What you are looking for
The batter should look silky and pourable, with no visible curds, cream cheese pieces, or starch pockets.
Very important
Do not rush this step. If the batter is lumpy before baking, it will still be lumpy after baking.
Chef’s secret
Pause the blender once or twice and scrape down the sides. Hidden lumps often cling to the corners.
Step 4. Check the texture of the batter
Once blended, look closely at the batter. It should be smooth like thick cream.
If it seems too thick, that usually means the cottage cheese was dry or grainy. Blend a little longer first. If needed, add 1 tablespoon of cream and blend again.
If it seems very runny, do not panic. Cottage cheese moisture levels vary. As long as you used the correct amount of cornstarch, it should still bake properly.
Chef’s tip
A smooth batter is more important than an ultra-thick batter.
Step 5. Pour into the pan
Pour the batter into your lined baking pan. Tap the pan gently on the counter 2–3 times to release large air bubbles.
Why this matters
Too many trapped air bubbles can create cracks or an uneven surface.
Beginner note
Do not bang the pan hard. A few gentle taps are enough.
Step 6. Bake in the air fryer or oven
Air fryer method
Bake at 300°F (150°C) for 40–45 minutes.
Oven method
Bake at 180°C for 35–40 minutes.
How to tell when it is done
The cheesecake should look set around the edges, while the center may still have a slight wobble when gently shaken. That is perfect.
Important
Do not wait until the entire center looks firm and dry. Overbaking is one of the most common beginner mistakes. The cheesecake continues setting as it cools.
Step 7. Protect the top if needed
If the top starts browning too quickly during baking, cover it loosely with foil.
How to do it correctly
Do not press the foil directly onto the surface. Tent it gently over the top so the cheesecake can still bake without the top darkening too much.
Chef’s secret
A softly golden top is lovely. A dark brown top usually means the heat is too aggressive.
Step 8. Cool gradually
Once baked, remove the cheesecake and let it cool in the pan at room temperature.
Do not slice it while it is hot.
Why this matters
Fresh from the oven, the cheesecake is still fragile. Cooling allows the structure to settle and prevents it from falling apart.
Best practice
Let it cool completely, then refrigerate for at least 4 hours, ideally overnight.
Step 9. Chill before serving
Chilling is not optional if you want the best texture. After refrigeration, the cheesecake becomes smoother, creamier, and easier to slice neatly.
Chef’s advice
This cheesecake is often even better the next day. The flavors settle, the texture improves, and the slices hold beautifully.
Step 10. Serve beautifully
Serve chilled on its own, or finish with:
- Fresh berries
- Powdered sugar
- Berry compote
- Citrus zest
- A drizzle of honey
- A spoonful of sour cream or whipped cream
Presentation tip
For clean slices, dip a knife in hot water, wipe it dry, and cut. Repeat between slices.
Why This Recipe Works
- Cottage cheese gives freshness and lightness
- Cream cheese adds richness and a more classic cheesecake flavor
- Eggs set the structure
- Heavy cream softens the texture
- Cornstarch helps prevent curdling and keeps the filling silky
- Optional sugar allows you to control sweetness based on your taste
Chef’s Best Tips
1. Blend longer than you think you need
This is the single biggest secret to a smooth cottage cheese cheesecake. Cottage cheese can look smooth in the container but still leave tiny curds in the batter.
2. Do not overbake
A slightly jiggly center is correct. A fully stiff center in the oven usually means the cheesecake will be dry after chilling.
3. Chill overnight for the best texture
You can eat it after a few hours, but overnight chilling gives the cleanest slices and the creamiest mouthfeel.
4. Use full-fat dairy for the best result
Low-fat products can make the texture thinner, grainier, or less satisfying.
5. Taste depends on your cottage cheese
Some cottage cheese is saltier, tangier, drier, or wetter than others. This can slightly change the final flavor and texture. If yours is very tangy, a bit more sugar may balance it beautifully.
6. Line the pan well
This cheesecake is tender, and parchment makes removal much easier.
7. Let it cool naturally
Avoid sudden temperature changes. Rapid cooling can make cheesecakes collapse or crack.
Common Mistakes to Avoid
- Not blending long enough
- Overbaking until fully firm in the center
- Trying to slice before chilling
- Using very cold ingredients and expecting a perfectly smooth batter instantly
- Forgetting to scrape down the blender sides
- Browning the top too aggressively
Nutrition
Estimated nutrition per serving
Based on 8 servings and using 100 g sugar. Values are approximate and may vary depending on the exact dairy products used.
- Calories: 210–235 kcal
- Protein: 9–11 g
- Fat: 13–15 g
- Carbohydrates: 12–15 g
- Sugar: 9–12 g
- Fiber: 0 g
- Sodium: varies by cottage cheese brand
Notes
- Using 120 g sugar increases calories and carbohydrates slightly.
- Skipping sugar reduces calories and creates a more neutral, lightly tangy cheesecake.
- Full-fat dairy gives the best flavor and texture.
FAQ
Can I skip the sugar?
Yes. If you prefer a lightly sweet or almost neutral cheesecake, you can reduce the sugar or leave it out. Just remember the result will taste more dairy-forward and less like a classic dessert cheesecake.
Can I use only cottage cheese without cream cheese?
You can, but the texture will be lighter and less rich. Cream cheese adds body and a more traditional cheesecake flavor.
My batter is lumpy. What should I do?
Blend longer and scrape down the sides of the blender. If needed, strain the batter for an extra-smooth finish.
Why is my cheesecake watery?
This usually happens if the cottage cheese contains a lot of moisture or if the cheesecake was underbaked. Chill it fully first. Next time, use thicker cottage cheese or drain it slightly before blending.
Why did the cheesecake crack?
Most often from overbaking or sudden cooling. Small cracks are only cosmetic and do not affect the flavor.
Can I make this in advance?
Yes, and it is actually better that way. Make it a day ahead and chill overnight.
How should I store it?
Keep it covered in the refrigerator for up to 3–4 days.
Can I freeze it?
Yes. Wrap slices well and freeze for up to 1 month. Thaw in the refrigerator overnight before serving.
Can I add flavors?
Absolutely. Try vanilla, lemon zest, orange zest, cinnamon, or a berry swirl.
Creamy Cottage Cheese Cheesecake
Instructions
- Preheat the air fryer to 150°C / 300°F or the oven to 180°C.
- Line a baking pan with parchment paper.
- Add cottage cheese, eggs, sugar, heavy cream, cream cheese, and cornstarch to a blender.
- Blend until completely smooth and creamy.
- Pour the batter into the prepared pan and tap gently to remove air bubbles.
- Bake in the air fryer for 40–45 minutes or in the oven for 35–40 minutes.
- If the top browns too quickly, cover loosely with foil.
- Cool completely, then chill for at least 4 hours before serving.
- Serve chilled with berries or powdered sugar.
Notes
- Blend very well for the smoothest texture.
- Do not overbake; the center should still jiggle slightly.
- Chill overnight for the best flavor and texture.
- Can I skip sugar? Yes, for a less sweet version.
- Can I make it ahead? Yes, it tastes even better the next day.
- How do I store it? Refrigerate covered for 3–4 days.