These flourless chocolate banana brownies are soft, moist, deeply chocolatey, and surprisingly wholesome. They are made without flour, butter, or refined sugar, yet they still have that rich brownie texture everyone loves: fudgy in the centre, slightly chewy on top, and full of natural sweetness from ripe bananas and a little honey. I’ll guide you through this recipe like I would guide someone standing beside me in the kitchen for the very first time. No complicated techniques, no special pastry skills — just simple ingredients, clear steps, and a few chef’s secrets that make all the difference.
🍫 Celebrate These Flourless Chocolate Banana Brownies As A Soft And Fudgy Treat For Any Moment
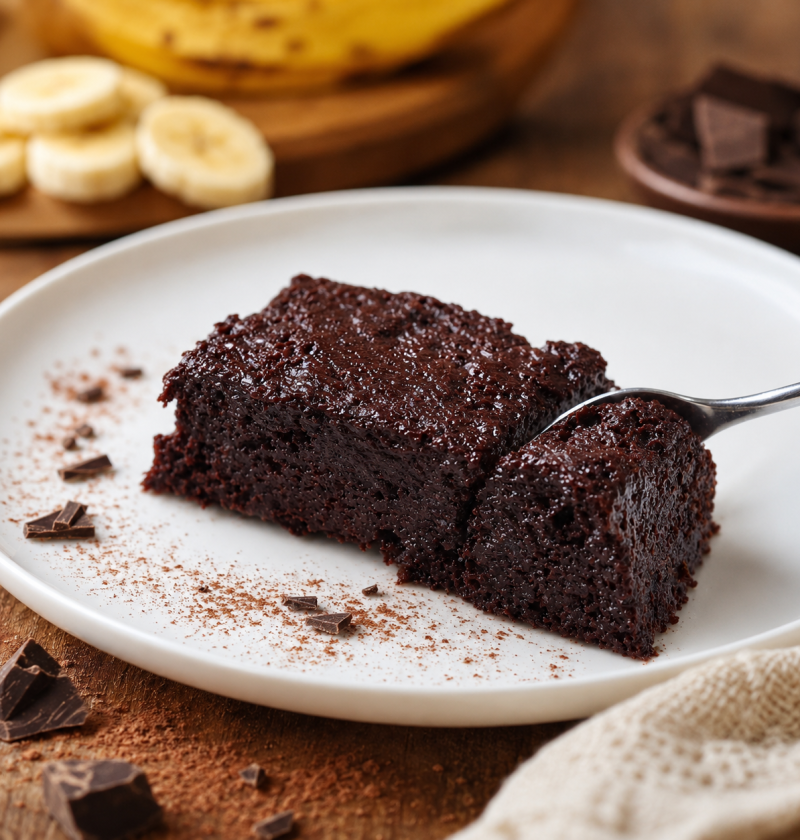
These Flourless Chocolate Banana Brownies With Velvet Cocoa Swirl are the kind of dessert that feels indulgent yet wonderfully simple, turning everyday bananas into a rich, chocolatey treat without a single gram of flour. The natural sweetness of ripe bananas creates a soft, moist base that blends seamlessly with deep cocoa, giving the brownies a fudgy texture that feels almost luxurious. As you mix the ingredients, the batter comes together effortlessly, making the process approachable even for someone who has never baked before. The aroma that fills the kitchen as the brownies bake is warm, comforting and unmistakably chocolatey, inviting you to slow down and enjoy the moment. Each slice reveals a tender interior with a glossy top, offering a balance of sweetness and cocoa richness that feels both familiar and exciting. These brownies are perfect for days when you want something homemade but uncomplicated, something that brings pleasure without demanding precision or advanced skills. They can be enjoyed warm, when the texture is soft and melting, or chilled, when the flavour deepens and the slices become firmer. This recipe guides you gently through each step, helping you understand not just what to do but why it works, so you gain confidence with every movement. Whether you serve them at a gathering or enjoy them quietly at home, these brownies offer a moment of comfort wrapped in chocolate. 🍫🍌✨
🍌 Let The Natural Sweetness Of Ripe Bananas Bring Warmth And Comfort To Every Bite
⏱ Quick Overview
Prep Time: 10 minutes
Cook Time: 55–60 minutes
Total Time: 1 hour 10 minutes
Servings: 5 brownies
Difficulty: Easy
Tin Size: 20 x 10 cm loaf tin
Oven Temperature: 180°C
✨ Enjoy How The Cocoa Creates A Deep Velvety Richness Without Needing Flour
⭐ Why You’ll Love This Recipe
- These brownies are flourless, making them naturally moist, tender and gluten‑free without extra effort.
- Ripe bananas add natural sweetness and structure, reducing the need for added sugar.
- The recipe uses minimal ingredients and simple steps, making it ideal for beginners.
- Cocoa powder creates a deep chocolate flavour that feels indulgent yet balanced.
- The brownies bake quickly, giving you a satisfying dessert in under 40 minutes.
- They taste delicious both warm and chilled, offering two different textures.
- The recipe is versatile and can be customised with nuts, chocolate chips or spices.
🔥 Choose This Quick Bake When You Want A Dessert That Feels Indulgent Yet Effortless
📅 Nutrition Per Serving (entire recipe: 9 servings)
- Serving Size: 70 g
- Calories: 165 kcal
- Carbohydrates: 22 g
- Protein: 4 g
- Fat: 7 g
- Saturated Fat: 4 g
- Fibre: 3 g
- Sugar: 13 g
- Sodium: 65 mg
- Potassium: 360 mg
- Calcium: 25 mg
- Iron: 1.2 mg
- Vitamin A: 45 IU
- Vitamin C: 4 mg
🍽️ Appreciate The Tender Texture That Comes From Simple Ingredients Working In Harmony
👨🍳 DETAILED STEP‑BY‑STEP RECIPE (Chef‑Level Instructions)
Step 1: Preheat the oven properly
Preheat your oven to 180°C. Do this before you start mixing the batter, because brownie batter should not sit around for too long once the baking powder is added.
Line a 20 x 10 cm loaf tin with parchment paper. Leave a little extra paper hanging over the sides — this works like handles and helps you lift the brownies out later.
Chef’s secret: Use a metal tin if possible. Metal heats more evenly and helps the brownies set better. Glass dishes hold heat differently and may make the centre cook more slowly.
Step 2: Choose the right bananas
Peel the bananas and break them into chunks. The bananas should be soft, sweet, and covered with brown spots.
Do not use green or barely yellow bananas. They will not give enough sweetness, and the brownies may taste flat.
Chef’s secret: The uglier the banana, the better the brownie. Fully ripe bananas bring natural sugar, moisture, and a creamy texture.
😋 Taste A Warm Square And Notice How The Banana Sweetness Balances The Chocolate Depth
Step 3: Blend the wet ingredients
Add the bananas, eggs, Greek yoghurt, and honey to a blender or food processor.
Blend until the mixture looks smooth and creamy. You should not see large banana pieces.
Beginner tip: If you do not have a blender, mash the bananas very well with a fork first, then whisk them with the eggs, yoghurt, and honey. The texture will be slightly more rustic, but still delicious.
Chef’s secret: Room-temperature eggs and yoghurt blend more easily and help the brownies bake more evenly.
Step 4: Add the cocoa powder and baking powder
Add the cocoa powder and baking powder to the blender.
Blend again briefly, just until everything is combined. Do not blend for too long. You want a smooth batter, but over-blending can add too much air and make the texture less fudgy.
Important tip: Cocoa powder often forms little lumps. If you want the smoothest result, sift it before adding it to the mixture.
Chef’s secret: Add a tiny pinch of salt if you have it. Salt does not make the brownies salty — it makes the chocolate flavour taste deeper and richer.
🌿 Add Nuts Or Chocolate Chips And Discover How Easily This Recipe Adapts To Your Mood
Step 5: Check the batter texture
The batter should look thick, glossy, and chocolatey. It will be looser than classic brownie batter because this recipe has no flour, but it should not be watery.
If your bananas were extra large and the batter looks too runny, add 1 tablespoon of fine oats or 1 tablespoon extra cocoa powder to help absorb moisture.
Chef’s secret: A glossy batter usually means the ingredients are well blended and the cocoa is fully hydrated.
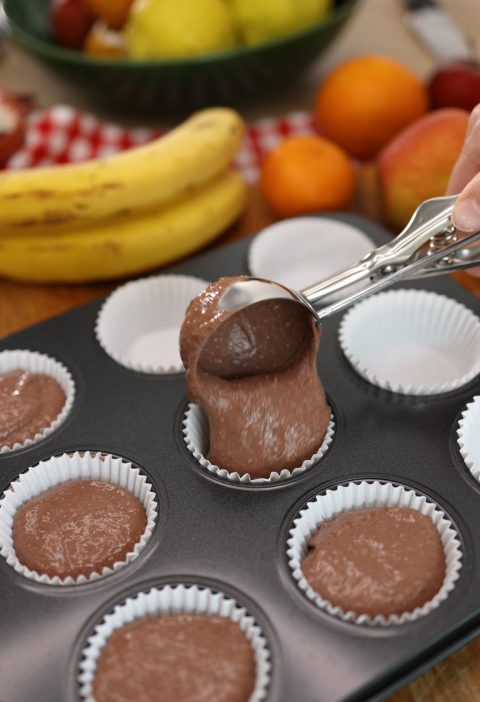
Step 6: Pour the batter into the tin
Pour the batter into the lined loaf tin. Use a spatula or spoon to smooth the top.
Gently tap the tin on the kitchen counter 2–3 times. This removes large air bubbles and helps the brownies bake with a more even texture.
Optional: Sprinkle dark chocolate chips or chopped nuts over the top before baking.
🍱 Pack A Chilled Square For Later And Enjoy A Soft Sweet Treat Wherever You Go
Step 7: Bake slowly until just set
Place the tin in the centre of the oven and bake for 55–60 minutes at 180°C.
Start checking at 50 minutes. Insert a toothpick into the centre. It should come out with a few moist crumbs, not completely wet batter.
Do not wait until the toothpick comes out perfectly clean. That usually means the brownies are overbaked.
Chef’s secret: Brownies continue to firm up as they cool. If you bake them until they look completely dry in the oven, they will be too dry after cooling.
Step 8: Cool in the tin first
Remove the tin from the oven and let the brownies cool in the tin for 10–15 minutes.
This resting time is important. The brownies are delicate when hot because they do not contain flour. If you lift them out too early, they may crack.
💛 Share These Brownies With Loved Ones And Offer A Dessert That Feels Both Homely And Special
Step 9: Cool completely before slicing
Use the parchment paper to lift the brownies out of the tin and transfer them to a cooling rack.
Let them cool completely before slicing. For the cleanest slices, chill them in the fridge for at least 1 hour.
Chef’s secret: These brownies taste even better the next day. After resting overnight in the fridge, the texture becomes denser, fudgier, and more chocolatey.
Step 10: Slice and serve
Cut into 5 even pieces.
For clean edges, use a sharp knife and wipe the blade between cuts.
Serve cold for a dense, fudgy texture, or warm each slice for 10–15 seconds in the microwave for a softer, dessert-like brownie.
🌟 Notice How The Glossy Top And Fudgy Centre Make Each Slice Look Quietly Luxurious
🍴 Chef’s Best Tips
- Use very ripe bananas. They are the main source of sweetness and moisture.
- Do not overbake. A few moist crumbs on the toothpick are exactly what you want.
- Let the brownies cool fully before slicing. This is the biggest secret to a fudgy texture.
- Sift the cocoa powder if you want a smooth, bakery-style batter.
- Use a metal loaf tin for more even baking.
- Add a pinch of salt to make the chocolate flavour stronger.
- Chill the brownies before cutting if you want neat slices.
- For a richer dessert version, add dark chocolate chips.
- For crunch, add walnuts or hazelnuts.
- Make them one day ahead — the flavour improves after resting overnight.
🍫 Return To This Recipe Whenever You Crave Chocolate Without Complicated Baking Steps
🛒 Ingredients
Brownie Batter
- 🍌 Bananas: 3 ripe bananas, mashed.
- 🥚 Eggs: 4 eggs.
- 🍶 Greek yoghurt: 200 g 0%
- 🍫 Cocoa Powder: Unsweetened cocoa powder.
- 🍯 Sweetener: Sugar, honey or alternative sweetener to taste.
- 🧂 Salt: A small pinch.
- 🧁 Baking Powder: For light lift, about 8 g
For Baking
- 🧾 Parchment Paper: For lining the dish.
- 🥣 Small Baking Dish: Square or rectangular.
🍌 Embrace The Simplicity Of Banana Based Baking And Enjoy Its Natural Moisture
🍽️ Kitchen Tools and 🛠️ Equipment Needed 🔪
- 🔪 Sharp Knife: For slicing brownies neatly.
- 🧺 Mixing Bowl: For combining ingredients.
- 🥄 Whisk: For mixing eggs and bananas.
- 🥄 Spatula: For smoothing batter.
- 🧾 Parchment Paper: For lining the baking dish.
- 🥘 Baking Dish: Square or rectangular.
- 🔥 Oven: For baking the brownies.
- 🍽️ Cooling Rack: For cooling the brownies evenly.
🥣 Mix The Batter Calmly And Feel How The Ingredients Come Together With Ease
❓ Questions
- Can I use frozen bananas? Yes, thaw them fully and drain excess liquid before mashing.
- Can I replace eggs? You can use flax eggs, but the texture will be slightly denser.
- Can I add chocolate chips? Yes, they melt beautifully and enhance richness.
- Can I reduce the sweetener? Absolutely; bananas provide natural sweetness.
- Can I use baking soda instead of baking powder? Baking powder works best for gentle lift.
- Can I make these brownies vegan? Yes, replace eggs with flax eggs and choose a vegan sweetener.
- Do they freeze well? They freeze beautifully and thaw quickly.
- Can I add nuts? Walnuts or pecans add great crunch.
- Can I use cacao instead of cocoa? Yes, but the flavour will be slightly more intense.
- How do I store them? Keep in an airtight container for up to three days.
🍽️ Serve These Brownies Warm With Ice Cream For A Comforting Dessert Experience
✨ Storage Tips
Store the brownies in an airtight container at room temperature for up to 2 days.
For a fudgier texture, keep them in the fridge for up to 5 days.
To freeze, wrap individual slices in parchment paper and place them in a freezer-safe container. Freeze for up to 3 months.
Thaw at room temperature or warm gently in the microwave for about 30 seconds.
👨🍳 CHEF’S BEST TIPS
- Use very ripe bananas for maximum sweetness and moisture.
- Mash bananas thoroughly to avoid lumps in the batter.
- Sift cocoa powder for a smooth, velvety texture.
- Do not over‑mix once the eggs are added.
- Tap the baking dish to release air bubbles before baking.
- Bake just until set; over‑baking dries the brownies.
- Cool before slicing for clean edges.
- Add chocolate chips for extra richness.
- Chill the brownies for a firmer texture.
- Serve warm for a softer, melt‑in‑the‑mouth experience.
🌈 Enjoy The Deep Colour And Aroma That Fill The Kitchen As The Brownies Bake
🌟 Serving Ideas
Serve these brownies with:
- A spoonful of Greek yoghurt
- Fresh berries
- A drizzle of melted dark chocolate
- A little almond or peanut butter
- Coffee or oat milk
- Banana ice cream
- A dusting of cocoa powder or cinnamon
🔥 Let This Recipe Become Your Go To When You Want Something Sweet In Under Forty Minutes
❓FAQ
Can I make these brownies without a blender?
Yes. Mash the bananas very well with a fork, then whisk them with the eggs, yoghurt, and honey. Add the cocoa powder and baking powder last. The texture may be slightly less smooth, but the brownies will still taste great.
Are these brownies gluten-free?
Yes, the recipe contains no flour. However, always check the labels on your cocoa powder and baking powder to make sure they are certified gluten-free if needed.
Can I replace the honey?
Yes. You can use maple syrup or date syrup instead of honey. Keep the same amount: 30 g.
Can I use cacao powder instead of cocoa powder?
Yes. Cacao powder works well, but it has a stronger and slightly more bitter flavour. If using cacao, you may want to add a little extra honey.
Why are my brownies too wet in the centre?
They may need more baking time, or the bananas may have been very large. Bake for another 5–10 minutes and let them cool completely before judging the texture.
💛 Allow This Simple Chocolate Treat To Bring A Moment Of Calm And Pleasure Into Your Day
Why are my brownies dry?
They were probably overbaked. Check them earlier next time, around 50 minutes. The toothpick should come out with moist crumbs, not completely clean.
Can I add protein powder?
Yes, but use caution. Add only 20–25 g of unflavoured or chocolate protein powder. Too much protein powder can make the brownies dry.
Can I make them sweeter?
Yes. Add an extra 10–15 g honey or a few dark chocolate chips. Very ripe bananas will also make a big difference.
Are these brownies good for kids?
Yes. They are soft, naturally sweet, and made with simple ingredients. For younger children, skip nuts and large chocolate chunks.
Can I freeze them?
Yes. Slice them first, place parchment between the pieces, and freeze in an airtight container.
✨ Add A Sprinkle Of Sea Salt On Top And Discover A New Layer Of Flavour
💛 These flourless chocolate banana brownies are a reminder that baking can be both simple and deeply satisfying, especially when you rely on the natural sweetness and softness of ripe bananas. As you mix the batter, you feel how effortlessly the ingredients come together, creating something rich without needing flour or complicated steps. The aroma that fills the kitchen as they bake is warm and comforting, inviting you to pause and enjoy the moment. When you slice into the cooled brownies, the tender interior and glossy top reveal a dessert that feels indulgent yet wholesome. Whether you enjoy them warm with a spoon or chilled in neat squares, each bite offers a balance of chocolate depth and banana sweetness that feels quietly luxurious. These brownies are perfect for sharing, but they are just as lovely enjoyed alone with a cup of tea or coffee. Over time, this recipe may become one of your reliable favourites, something you return to whenever you want a dessert that is easy, comforting and full of flavour. 🍫🍌
🍫 Savour Each Bite Slowly And Appreciate The Soft Fudgy Texture
📦 SHORT RECIPE
Ingredients
- Bananas 3 ripe
- Eggs 4
- Greek yoghurt
- Cocoa powder unsweetened
- Sweetener to taste
- Salt a pinch
- Baking powder
- Parchment paper
- Small baking dish
Instructions
- Line a baking dish with parchment paper.
- Mash bananas until smooth.
- Add eggs and mix gently.
- Add cocoa powder, sweetener, salt and baking powder.
- Mix until smooth.
- Pour batter into the dish.
- Bake at for 25 minutes.
- Cool for 15 minutes.
- Slice and serve warm or chilled.
🍌 Make These Brownies Part Of Your Regular Baking Rotation And Enjoy Their Ease
Flourless Chocolate Banana Brownies
Instructions
- Preheat the oven to 180°C and line a 20 x 10 cm loaf tin with parchment paper.
- Peel the bananas and break them into chunks.
- Add bananas, eggs, Greek yoghurt, and honey to a blender. Blend until smooth.
- Add cocoa powder and baking powder. Blend briefly until combined.
- Pour the batter into the prepared tin and smooth the top.
- Bake for 55–60 minutes, or until a toothpick comes out with a few moist crumbs.
- Cool in the tin for 10–15 minutes.
- Transfer to a rack and cool completely before slicing.
- Cut into 5 pieces and serve.