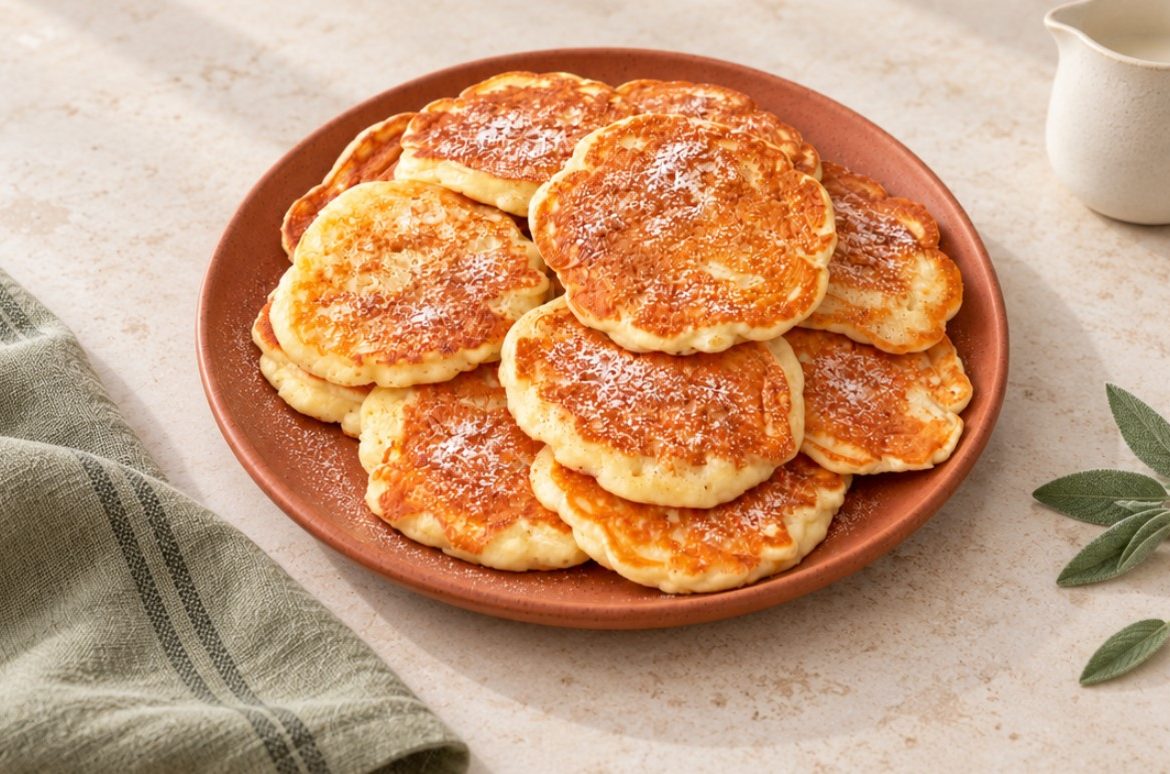
These soft Apple Yogurt Pancakes are filled with small pieces of juicy apple and finished with a fresh hint of lemon zest. They are thick, tender, lightly sweet, and wonderfully aromatic — perfect for breakfast, an afternoon snack, or a simple homemade dessert.
Natural yogurt keeps the inside moist and tender, while a small amount of oil in the batter prevents the pancakes from becoming dry once they cool. Fresh lemon zest brightens the apple flavor without overpowering it.
The most important thing with this recipe is to keep the batter fairly thick and cook the pancakes over medium-low heat. If the pan is too hot, the outside will brown before the center has enough time to cook.
Even if you have very little experience with cooking pancakes, the detailed instructions below will help you get soft, evenly cooked results.
Recipe Overview
Prep time: 20 minutes
Batter resting time: 5 minutes
Cooking time: about 20–30 minutes
Total time: about 45–55 minutes
Yield: approximately 12–16 pancakes
Servings: 4–6
Method: Stovetop
Difficulty: Easy
Texture: Soft, thick, moist, and fluffy
Which Apples Are Best?
For these pancakes, choose apples that have plenty of flavor but still hold their shape when heated.
Good varieties include:
- Braeburn
- Pink Lady
- Gala
- Jonagold
- Elstar
- Granny Smith
Sweet apples such as Gala or Jonagold produce milder, naturally sweeter pancakes.
If you prefer a slightly fresher, tangier flavor, use Granny Smith or Elstar.
I recommend avoiding apples that are extremely soft or watery because they can release too much liquid into the batter.
What Kind of Yogurt Should I Use?
Regular unsweetened natural yogurt works very well.
A yogurt containing around 3–4% fat gives particularly tender results, but low-fat yogurt can also be used.
Greek yogurt works too, although it is usually thicker. If the finished batter becomes too stiff, add 15–30 ml of milk or a little extra yogurt.
Avoid highly liquid drinking-style yogurt because it can make the batter too loose.
What Oil Is Best?
Use a neutral-flavored oil such as:
- sunflower oil
- rapeseed oil
- canola oil
- mild vegetable oil
- mild olive oil
A strongly flavored extra-virgin olive oil can overpower the delicate apple and lemon flavors.
Equipment
You will need:
- large mixing bowl
- small bowl
- whisk
- silicone spatula or wooden spoon
- kitchen scale
- sharp knife
- cutting board
- fine citrus grater
- large nonstick frying pan
- wide spatula
- tablespoon or small cookie scoop
Detailed Step-by-Step Instructions
1. Bring the Egg and Yogurt Closer to Room Temperature
Take the egg and yogurt out of the refrigerator about 15–20 minutes before preparing the batter.
This is not absolutely essential, but ingredients at similar temperatures combine more smoothly.
Chef’s tip:
If you forgot to take the egg out early, place it in a bowl of lukewarm water for about 5 minutes.
Do not use hot water.
2. Prepare the Lemon
Wash the lemon thoroughly under warm running water and dry it.
Use an unwaxed or organic lemon whenever possible because the zest goes directly into the batter.
Finely grate only the yellow outer layer of the peel.
Avoid the White Pith
Do not grate deeply enough to reach the thick white layer beneath the zest.
The white pith contains significantly more bitter compounds and can give the pancakes an unpleasant aftertaste.
3. Squeeze the Lemon Juice
Squeeze about 15–30 ml fresh lemon juice.
Use:
- about 15 ml for a mild citrus note;
- up to 30 ml for a fresher, more noticeable lemon flavor.
I recommend starting with 15 ml, especially if your yogurt is already tangy.
Chef’s secret:
Lemon zest gives much more aroma than lemon juice. If you want a stronger lemon flavor without making the batter thinner, add a little more zest rather than a large amount of juice.
4. Prepare the Apples
Wash and dry the apples.
Peeling is optional.
If the skin is thin and tender, you can leave it on. If it is thick or tough, peel the apples for a softer finished texture.
Remove the cores and seeds.
Cut the flesh into small cubes measuring approximately 5–8 mm.
Why Should the Apple Pieces Be Small?
The pancakes cook for only a few minutes on each side.
Small apple cubes:
- soften quickly;
- distribute evenly through the batter;
- make the pancakes easier to flip;
- prevent large raw pieces in the center.
Avoid cutting the apples into large chunks.
5. Combine the Egg and Sugar
Crack the egg into a large mixing bowl.
Add 60 g sugar.
Whisk for about 30–60 seconds until the mixture looks smooth and evenly combined.
There is no need to beat the egg until very fluffy.
The baking powder will provide most of the lift.
6. Add a Pinch of Salt
Add a small pinch of salt if desired.
It will not make the pancakes taste salty.
A tiny amount of salt actually makes the apple, lemon, and vanilla-like dairy notes taste more pronounced.
7. Add the Yogurt
Add 200 g plain yogurt.
Whisk until completely combined with the egg mixture.
You should no longer see large streaks or lumps of yogurt.
Why Yogurt Works So Well
Yogurt contributes:
- moisture;
- tenderness;
- a subtle tang;
- a soft interior.
Its acidity also works particularly well in batters containing baking powder.
8. Add the Vegetable Oil
Pour in 50 ml neutral vegetable oil.
Whisk until the mixture looks smooth and there is no visible layer of oil floating on top.
Why Put Oil in the Batter?
Oil keeps the pancakes tender even after cooling.
It also means you need only a very small amount of extra oil in a good nonstick pan.
9. Add the Lemon
Stir in:
- the finely grated lemon zest;
- 15–30 ml lemon juice.
Mix briefly.
Do not worry if the mixture looks slightly thinner after adding the lemon juice.
Preparing the Dry Ingredients
10. Mix the Flour and Baking Powder Separately
In a separate bowl, combine:
- 350 g all-purpose flour;
- 7 g baking powder.
Whisk them together thoroughly.
For an especially smooth batter, sift them together.
Why Mix Them Separately?
This distributes the baking powder evenly throughout the flour.
Adding baking powder directly to one spot in the wet batter can result in uneven rising.
11. Add the Flour Gradually
Add about one third of the flour mixture to the wet ingredients.
Stir gently.
Add another third and mix again.
Finally, add the remaining flour.
This makes it easier to avoid dry pockets and lumps.
12. Do Not Overmix the Batter
Stop stirring as soon as you can no longer see dry flour.
A few tiny lumps are completely acceptable.
Why Is Overmixing a Problem?
Flour contains gluten-forming proteins.
The more aggressively the batter is mixed, the more gluten develops. Too much mixing can produce pancakes that are chewy rather than soft.
A useful rule is:
Mix only until the flour disappears.
Checking the Batter Consistency
13. Look for a Thick, Spoonable Batter
The batter should be considerably thicker than ordinary crepe batter.
It should:
- stay on a spoon;
- fall off slowly;
- spread only slightly on its own;
- be thick enough to support the apple pieces.
It should resemble a thick fritter or American-style pancake batter.
14. If the Batter Is Too Thick
Different flours absorb different amounts of moisture.
If the batter seems almost impossible to stir, add:
- 15 ml yogurt or milk.
Mix briefly and check again.
Add another 10–15 ml only if necessary.
15. If the Batter Is Too Thin
If the batter flows quickly off the spoon, add approximately 10–20 g additional flour.
Mix briefly and let it stand for 2 minutes before deciding whether it needs more.
Do not keep adding large amounts of flour at once.
16. Fold in the Apples
Add the diced apples to the finished batter.
Use a silicone spatula to fold them in gently.
Work from the bottom of the bowl upward until the apple pieces are distributed evenly.
Avoid vigorous stirring at this point.
17. Let the Batter Rest Briefly
Leave the batter at room temperature for about 5 minutes.
This short rest allows:
- the flour to hydrate;
- the batter to become slightly more even;
- the baking powder to begin working.
Do not leave the prepared batter sitting for 30–60 minutes because the baking powder gradually loses some of its effectiveness.
How to Cook the Pancakes
18. Preheat the Pan Slowly
Place a large nonstick frying pan over medium-low heat.
Allow it to heat for about 2 minutes.
Add a small amount of vegetable oil and spread it into a very thin layer.
A pastry brush or folded piece of kitchen paper works particularly well.
19. Test the Heat
Add a tiny spoonful of batter to the pan.
It should begin to sizzle gently after a few seconds.
If It Browns Immediately
The pan is too hot.
Reduce the heat and wait briefly before cooking the first batch.
If Nothing Happens
Increase the heat slightly.
Chef’s tip:
The first pancake is often your temperature test. Once you know the correct heat setting for your stove, the remaining batches become much easier.
20. Portion the Batter
For each pancake, place approximately 1 generously heaped tablespoon of batter into the pan.
Cook only 3–4 pancakes at a time, depending on the size of your pan.
Leave enough room between them for easy flipping.
21. Flatten the Pancakes Slightly
Use the back of the spoon to gently flatten each portion.
Aim for approximately:
- 7–8 cm diameter;
- 1–1.5 cm thickness.
Why Thickness Matters
Very thick pancakes can become brown outside before the center cooks.
Slightly flatter pancakes cook much more evenly.
22. Cook the First Side Slowly
Cook for approximately 2–4 minutes.
Avoid constantly moving the pancakes.
Let a stable crust form underneath.
They Are Ready to Flip When:
- the bottom is golden brown;
- the edges look set;
- the top no longer appears completely wet;
- a spatula slides underneath without tearing them.
23. Flip Carefully
Slide a wide spatula completely underneath one pancake.
Turn it over with one controlled movement.
If it feels very soft and unstable, wait another 30–60 seconds before trying again.
Beginner Tip
Smaller pancakes are considerably easier to flip than very large ones.
24. Cook the Second Side
Cook the second side for another 2–4 minutes over medium-low heat.
Adjust the temperature whenever necessary.
The pancakes should become golden, not dark brown.
The Secret for Perfectly Cooked Centers
25. Use a Lid for Thick Pancakes
If your pancakes are relatively thick, cover the pan with a lid for about 1–2 minutes after flipping.
The trapped heat and steam help cook the center.
Remove the lid for the final minute so the outside does not become overly soft.
This is one of the most useful techniques when making thick apple pancakes.
26. Check the First Pancake
For your first batch, cut one pancake in half.
The center should be:
- soft;
- moist;
- fully cooked;
- free from shiny raw batter.
The apple pieces should feel tender but do not need to turn into applesauce.
Once you know the correct cooking time, use it for the remaining batches.
27. Control the Heat Between Batches
A frying pan usually becomes hotter as cooking continues.
You may need to gradually reduce the heat after the first or second batch.
This prevents later pancakes from becoming too dark.
28. Add Oil Sparingly
Do not pour a large amount of oil into the pan between every batch.
The batter already contains oil.
In a good nonstick pan, a very thin coating is enough.
Too much oil can make the pancakes greasy and heavy.
Serving
Serve the apple yogurt pancakes warm for the softest texture.
They are delicious on their own, but you can also serve them with:
- powdered sugar;
- honey;
- maple syrup;
- berry preserves;
- Greek yogurt;
- sour cream;
- applesauce;
- fresh berries;
- cinnamon.
For a fresh combination, serve them with thick Greek yogurt and a little additional grated lemon zest.
Chef’s Best Tips
1. Cut the Apples Small
Pieces around 5–8 mm cook quickly and evenly.
Large chunks may stay firm in the center.
2. Use Only the Yellow Lemon Zest
Avoid the bitter white pith.
3. Mix Flour and Baking Powder Separately
This gives the pancakes more even lift.
4. Do Not Overmix
Once the flour disappears, stop stirring.
This is one of the easiest ways to keep the pancakes tender.
5. Keep the Batter Thick
A thick batter supports the apple pieces and makes the pancakes easier to flip.
6. Cook Over Medium-Low Heat
This is the single most important cooking tip.
High heat browns the outside too quickly.
7. Keep the Pancakes Moderately Small
Smaller pancakes are easier to turn and cook much more evenly.
8. Flatten Them Slightly
A thickness of around 1–1.5 cm is ideal.
9. Use a Lid When Necessary
A short covered cooking time helps thick pancakes cook through without burning.
10. Treat the First Pancake as a Test
Adjust the temperature and thickness before cooking the entire batch.
11. Use Very Little Frying Oil
The batter already contains 50 ml oil.
12. Adjust Lemon Juice Carefully
More juice means both more acidity and more liquid. For stronger lemon flavor, increase the zest instead.
Common Problems and How to Fix Them
Pancakes Are Dark Outside but Raw Inside
The pan is too hot or the pancakes are too thick.
Reduce the temperature and make slightly smaller, flatter pancakes.
You can also cover the pan briefly after flipping.
Pancakes Spread Too Much
The batter is too thin.
Add 10–20 g flour and let the batter rest for 2 minutes.
Batter Is Extremely Thick
Add yogurt or milk 1 tablespoon at a time.
Do not add a large amount of liquid at once.
Pancakes Stick to the Pan
Possible reasons include:
- the pan was not properly preheated;
- the nonstick coating is worn;
- there was no oil at all;
- you tried to flip them too early.
Allow a golden crust to develop before turning.
Pancakes Break When Flipped
They probably need another minute on the first side.
They may also be too large.
Pancakes Are Tough
The flour was probably mixed for too long.
Next time, stir only until the dry ingredients disappear.
Apple Pieces Stay Hard
The cubes are too large or the cooking temperature is too high.
Cut the apples more finely and cook more slowly.
Pancakes Absorb Too Much Oil
The pan may be too cool or you are using too much frying oil.
Use only a thin coating in a properly heated pan.
Flavor Variations
Apple Cinnamon Pancakes
Add 2–3 g ground cinnamon to the flour.
Apple, cinnamon, and lemon work beautifully together.
Apple Vanilla Pancakes
Add 5 ml vanilla extract.
Apple Walnut Pancakes
Fold in 30–40 g finely chopped walnuts.
Apple Raisin Pancakes
Add about 30 g raisins.
Very dry raisins can be soaked briefly in warm water and dried before using.
Apple-Orange Pancakes
Replace the lemon zest with finely grated zest of one small organic orange.
Pear Pancakes
Replace part or all of the apple with firm pears.
Storage
Allow leftover pancakes to cool completely.
Place them in an airtight container, separating layers with baking paper if necessary.
Store in the refrigerator for up to 2–3 days.
How to Reheat
In a Frying Pan
Warm over low heat for about 1–2 minutes per side.
This gives the best texture.
In an Air Fryer
Heat at approximately 160 °C for 3–5 minutes.
In the Oven
Warm at 160 °C for approximately 5–8 minutes.
In the Microwave
Heat individual pancakes for roughly 20–30 seconds.
They will be soft rather than crisp.
Can You Freeze Apple Yogurt Pancakes?
Yes.
- Allow the pancakes to cool completely.
- Place baking paper between the pancakes.
- Transfer them to an airtight freezer container or bag.
- Freeze for up to about 2 months.
- Thaw in the refrigerator or reheat gently from frozen.
For the best texture, reheat them in a frying pan or air fryer.
Nutrition
Approximate nutrition per pancake when the recipe makes 14 medium pancakes, excluding additional oil absorbed during frying:
- Calories: about 160–165 kcal
- Protein: about 3.5–4 g
- Fat: about 4–5 g
- Carbohydrates: about 27 g
- Sugars: about 7 g
- Fiber: about 1–1.5 g
The exact values depend on the yogurt, apple variety, pancake size, and particularly the amount of additional oil absorbed during frying.
FAQ
Do I Need to Peel the Apples?
No.
Thin-skinned apples can be used unpeeled.
For apples with thick or tough skin, peeling gives a softer result.
Can I Grate the Apples Instead?
Yes, but grated apples release considerably more juice.
If you grate them, lightly squeeze out excessive liquid before adding them to the batter.
The texture will also be softer than with diced apple.
Can I Use Greek Yogurt?
Yes.
If it is particularly thick, add a small amount of milk if needed.
Can I Use Low-Fat Yogurt?
Yes.
The pancakes may be slightly less rich but the recipe will still work.
Can I Use Kefir?
Yes, although kefir is thinner than yogurt.
You may need slightly more flour.
Can I Use Sour Cream?
Yes.
If your sour cream is very thick, add a little milk to achieve the correct batter consistency.
Can I Reduce the Sugar?
Absolutely.
For mildly sweet pancakes, reduce the sugar to about 30–40 g, especially if your apples are sweet.
Can I Make Them Without Added Sugar?
Yes.
The pancakes will then be only mildly sweet from the apples.
Serve them with fruit, yogurt, or a little honey if desired.
Can I Replace Sugar with Honey?
Yes, but honey adds extra liquid.
Try approximately 40–50 g honey and adjust the flour if necessary.
Can I Leave Out the Lemon Juice?
Yes.
The lemon zest alone provides plenty of aroma.
Can I Add More Lemon Zest?
Yes.
For a stronger citrus flavor, use the zest of up to 1½ lemons while avoiding the white pith.
Can I Use Whole-Wheat Flour?
Yes, but I recommend replacing only half of the flour at first.
Whole-wheat flour absorbs more liquid, so additional yogurt or milk may be required.
Can I Use Spelt Flour?
Yes.
Light spelt flour can generally be used in the same quantity.
Mix the batter gently because spelt can become delicate when overmixed.
Can I Use Gluten-Free Flour?
A gluten-free 1:1 baking blend is the easiest substitution.
The exact amount of liquid needed may vary by brand.
Why Is My Batter So Thick?
It is supposed to be considerably thicker than crepe batter.
If it is almost impossible to stir, however, add a small amount of yogurt or milk.
Does the Batter Need to Rest?
About 5 minutes is useful.
A much longer rest is unnecessary once the baking powder has been added.
Why Aren’t My Pancakes Fluffy?
Possible reasons include:
- old baking powder;
- overmixed batter;
- a pan that is too cool;
- pancakes that have been pressed too thin.
How Do I Know When to Flip Them?
The edges should look set and the underside should be golden brown.
The pancake should feel stable enough to lift with a spatula.
Why Do They Burn So Quickly?
The batter contains sugar, which browns quickly.
Lower the heat and give the center more time to cook.
Can I Make the Batter the Night Before?
I do not recommend it.
The apples release moisture as they stand, and the baking powder becomes less effective.
Freshly mixed batter gives better results.
Can I Eat Them Cold?
Yes.
They are particularly soft when warm, but they are also delicious chilled or at room temperature.
Apple Yogurt Pancakes with Lemon Zest
Instructions
- Wash the apples, peel if desired, remove the cores, and cut into 5–8 mm cubes.
- Wash and dry the lemon. Finely grate only the yellow zest and squeeze out 15–30 ml juice.
- Whisk the egg and sugar together in a large bowl until smooth.
- Add the yogurt and 50 ml vegetable oil and whisk to combine.
- Stir in the lemon zest, lemon juice, and optional pinch of salt.
- In a separate bowl, combine the flour and baking powder.
- Gradually add the dry ingredients to the wet ingredients and mix only until no dry flour remains.
- The batter should be thick and slowly fall from a spoon. If necessary, add 15–30 ml yogurt or milk if too thick, or a little flour if too thin.
- Gently fold in the diced apples.
- Let the batter rest for about 5 minutes.
- Heat a nonstick frying pan over medium-low heat and brush it with a thin layer of oil.
- Add one heaped tablespoon of batter per pancake.
- Gently flatten each pancake to approximately 1–1.5 cm thick.
- Cook for 2–4 minutes, until the underside is golden and the edges are set.
- Carefully flip and cook for another 2–4 minutes.
- For thicker pancakes, cover the pan for 1–2 minutes to help the centers cook completely.
- Serve warm with yogurt, honey, powdered sugar, applesauce, or fresh berries.