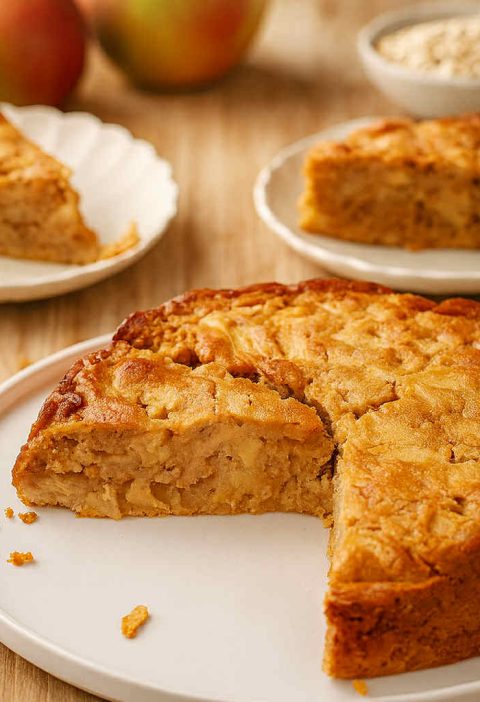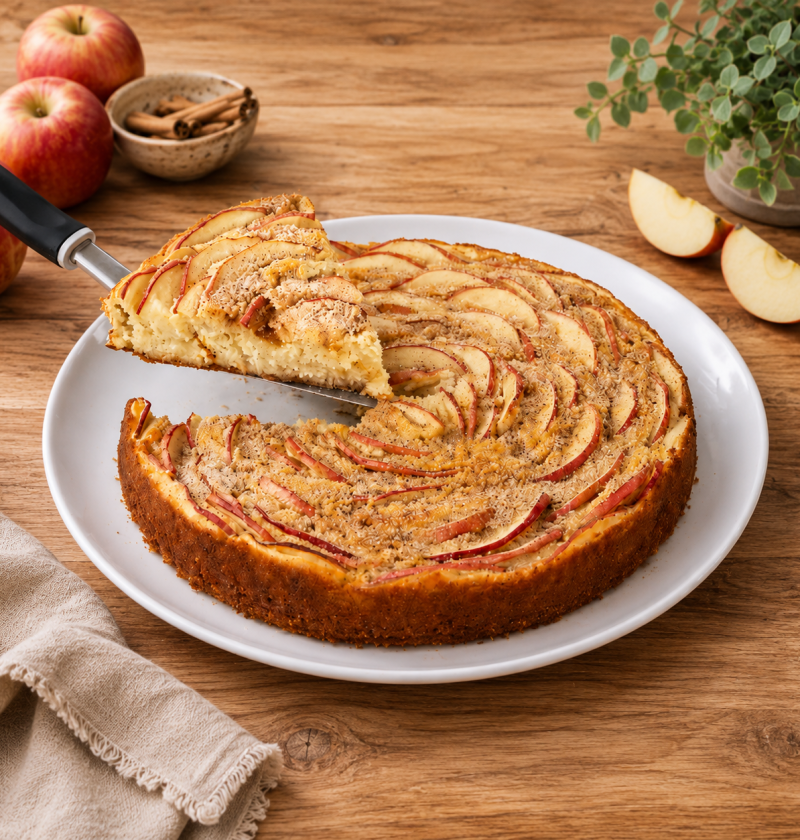
This beautiful Apple Rose Yogurt Cake looks as though it came from a pastry-shop window, yet it is surprisingly simple to prepare at home. The batter is soft, lightly creamy, and delicately flavoured with grated apple, while thin apple slices arranged in overlapping circles create an elegant rose design on top.
You do not need any special decorating skills. The secret is simply to slice the apples very thinly, soften them slightly if necessary, and arrange them one overlapping layer at a time.
The cake is moist without being heavy, gently sweet rather than sugary, and perfect for breakfast, an afternoon treat, or a simple dessert served with coffee or tea.
Recipe Information
Preparation time: 15 minutes
Baking time: 30–35 minutes
Cooling time: 20 minutes
Total time: Approximately 1 hour
Servings: 8 slices
Cake tin: 22 cm round cake tin or springform tin
Oven temperature: 180°C conventional oven or 160°C fan oven
Important Chef’s Formula Note
The original version of this recipe uses six tablespoons of flour, which is only approximately 50–60 grams. That amount is not enough to support the eggs, yogurt, milk, butter, and apples, and the finished dessert may remain wet or collapse after baking.
For a consistently soft, moist, but sliceable cake, use 180 grams of plain flour and 10 grams of baking powder. This ratio produces a reliable batter while keeping the cake tender.
Equipment
- 22 cm round cake tin or springform tin
- Baking paper
- Two mixing bowls
- Whisk
- Silicone spatula or wooden spoon
- Box grater
- Sharp knife or mandoline slicer
- Pastry brush, optional
Detailed Step-by-Step Instructions
Step 1: Prepare the oven and cake tin
Preheat the oven to 180°C using conventional heat or 160°C using a fan-assisted setting.
Line the base of a 22 cm round cake tin with baking paper. Lightly grease the paper and the sides of the tin with butter.
Do not skip the preparation of the tin. This cake is very moist, and the grated apple can make it more likely to stick than an ordinary sponge cake.
A springform tin is particularly convenient because the sides can be removed without turning the decorated cake upside down.
Step 2: Prepare the apples for the rose
Wash and dry the two apples intended for the topping. You may leave the skin on, especially when using red apples, because the coloured peel creates a beautiful outline around the rose petals.
Cut each apple into quarters and remove the core. Slice the apple quarters into very thin slices, ideally about 1–2 mm thick.
A mandoline slicer gives the most even result, but a sharp knife also works. Take your time and keep the slices as consistent as possible.
Place the slices in a bowl and add the lemon juice. Toss them gently with your fingers so that the slices do not turn brown.
What to do when the apple slices are too firm
Some apple varieties are too crisp to bend without breaking. Place the slices in a microwave-safe bowl, cover loosely, and microwave them for approximately 45–60 seconds.
Alternatively, place them in a small saucepan with one tablespoon of water and warm them over low heat for one or two minutes.
The slices should become flexible, not fully cooked. Allow them to cool before arranging them on the batter.
Step 3: Grate the apple for the batter
Peel and core the small apple. Grate it using the coarse side of a box grater.
If the apple releases a large amount of liquid, press it very gently between your hands or against the side of the bowl. Remove only the excess juice; do not squeeze the apple completely dry.
The moisture from the grated apple is one of the reasons this cake stays soft.
Set the grated apple aside while preparing the batter.
Step 4: Mix the eggs and sugar
Place the eggs and 50 g of sugar in a large mixing bowl.
Whisk for approximately two minutes, until the mixture is smooth, slightly paler, and lightly foamy. You do not need to whip it to ribbon stage as you would for a traditional sponge cake.
The purpose of this step is to dissolve some of the sugar and introduce a small amount of air into the batter.
Step 5: Add the wet ingredients
Slowly pour in the melted butter while whisking.
The butter should be liquid but no longer hot. Hot butter can partially cook the eggs or cause the mixture to separate.
Add the milk, yogurt, and vanilla extract. Whisk until the mixture looks smooth and evenly combined.
For the best texture, use milk and yogurt at room temperature. Very cold dairy products can cause the melted butter to solidify into small lumps. The cake will usually still bake, but the batter will be less even.
Step 6: Combine the dry ingredients
In a separate bowl, mix the flour, baking powder, and salt.
Sifting is optional, but it is useful when the flour or baking powder contains lumps.
Add the dry ingredients to the wet mixture in two additions. Fold gently with a silicone spatula after each addition.
Stop mixing as soon as no dry flour remains.
Do not beat the batter vigorously after adding the flour. Overmixing develops too much gluten and can make the cake rubbery instead of soft.
The finished batter should be smooth and thick enough to fall slowly from the spatula. It should not be as runny as pancake batter.
Step 7: Fold in the grated apple
Add the grated apple to the batter.
Fold it in gently until it is distributed throughout the mixture. Scrape the bottom and sides of the bowl to make sure no pockets of flour remain.
Pour the batter into the prepared cake tin and spread the surface evenly.
Tap the tin gently against the worktop once or twice. This removes large air pockets, but do not tap it repeatedly or all the air introduced during mixing may escape.
Step 8: Create the apple rose
Begin arranging the apple slices around the outside edge of the cake.
Place each slice at a slight angle, with approximately one-third to one-half of the next slice overlapping the previous one.
Continue working in concentric circles toward the centre.
For the centre of the rose, use the smallest and most flexible apple slices. Roll one thin slice loosely and place it in the middle. Wrap one or two additional slices around it to create the appearance of a flower bud.
Do not push the slices deeply into the batter. They should rest mainly on the surface. The cake will rise around them as it bakes.
Step 9: Add the cinnamon topping
Mix the remaining 10 g of sugar with the ground cinnamon.
Sprinkle the mixture evenly over the apple slices.
For a more golden and glossy finish, brush the apples very lightly with 10 g of melted butter. Use only a thin coating; too much butter can weigh down the surface.
Step 10: Bake the cake
Place the cake on the middle shelf of the preheated oven.
Bake for 30–35 minutes.
Begin checking the cake after 28 minutes, especially when using a wide or dark-coloured cake tin.
The cake is ready when:
- The edges are lightly golden.
- The centre looks set rather than wet or shiny.
- The surface springs back gently when touched.
- A wooden skewer inserted into the cake batter comes out clean or with a few moist crumbs.
Insert the skewer between the apple slices rather than directly through an apple, because cooked apple will naturally make the skewer look moist.
If the apples are browning too quickly while the centre is still underbaked, cover the cake loosely with a sheet of aluminium foil and continue baking.
Step 11: Cool the cake correctly
Remove the cake from the oven and leave it in the tin for approximately 15 minutes.
Run a thin knife carefully around the edge before releasing the springform ring or lifting the cake from the tin.
Allow it to cool for at least another 15–20 minutes before slicing.
A very warm cake is fragile and may appear wetter than it really is. Cooling allows the crumb to finish setting.
Step 12: Add the optional glaze
For a professional bakery-style finish, mix the apricot jam with the hot water.
Warm it briefly if necessary, then brush a very thin layer over the apple slices.
The glaze adds shine, prevents the apples from drying out, and gives the top a subtle fruity flavour.
Do not apply a thick layer, as this can make the cake sticky and overly sweet.
How to Serve Apple Rose Cake
Serve the cake slightly warm or at room temperature.
It is delicious on its own, but it can also be served with:
- A light dusting of icing sugar
- Plain Greek yogurt
- Lightly whipped cream
- Vanilla ice cream
- Crème fraîche
- Warm vanilla custard
For clean slices, allow the cake to cool and use a sharp serrated knife. Wipe the blade between cuts if the apple topping begins to stick.
Chef’s Best Tips
1. Choose firm apples
Use apples that hold their shape during baking. Braeburn, Pink Lady, Gala, Jonagold, or Granny Smith are good choices.
Very soft or mealy apples may break apart and lose the rose pattern.
2. Slice the apples extremely thinly
The thinner the slices, the easier they are to bend and overlap.
Thick slices can remain firm after baking and may sink into the batter.
3. Use room-temperature ingredients
Eggs, milk, and yogurt combine more evenly when they are not refrigerator-cold.
Room-temperature ingredients also help the cake rise more consistently.
4. Cool the melted butter
The butter should feel lukewarm, not hot, before it is added to the eggs.
5. Measure flour by weight
Do not rely on tablespoons for flour. The amount in one spoon varies depending on how tightly it is packed.
A digital kitchen scale gives a much more reliable result.
6. Do not overmix the batter
Once the flour has been added, mix only until the ingredients are combined.
A few small lumps are better than an overworked batter.
7. Keep the apple slices on the surface
Pressing the apples too deeply into the batter can cause the rose to disappear as the cake rises.
8. Check the cake, not the clock
Ovens and cake tins vary. Use the visual signs of doneness and the skewer test rather than relying only on the stated baking time.
9. Allow the cake to cool before judging the texture
A cake containing yogurt and fresh apple will remain very soft while hot. Its crumb becomes more stable as it cools.
10. Add the glaze while the cake is warm
A thin apricot glaze spreads most easily when the cake is still slightly warm, but not steaming hot.
Nutrition
Approximate nutrition per serving, based on 8 slices:
- Calories: 227 kcal
- Carbohydrates: 34 g
- Protein: 5 g
- Fat: 8 g
- Saturated fat: 4.7 g
- Fibre: 2 g
- Sugars: 14.5 g
- Sodium: 160 mg
Nutritional values are estimates and may vary depending on the apples, yogurt, milk, butter, and serving size used.
Storage Instructions
Keep the completely cooled cake in an airtight container.
It can be stored at room temperature for up to one day in a cool kitchen. After that, refrigerate it because the cake contains yogurt and a large amount of fresh fruit.
Refrigerated cake will keep well for three to four days.
Allow individual slices to return to room temperature before serving, or warm them in a microwave for approximately 10–15 seconds.
Freezing Instructions
The cake can be frozen for up to two months.
Allow it to cool completely, then wrap individual slices tightly in food-safe wrap and place them in an airtight freezer container.
For the best result, freeze the cake without the apricot glaze.
Thaw overnight in the refrigerator or for one to two hours at room temperature.
Frequently Asked Questions
Can I use Greek yogurt?
Yes. Full-fat Greek yogurt works well, but it is usually thicker than ordinary plain yogurt.
Add an additional 15–30 ml of milk if the batter seems unusually stiff. The batter should fall slowly from the spatula rather than remaining in a solid mound.
Can I use low-fat yogurt?
Yes, although full-fat yogurt gives the cake a softer texture and richer flavour.
Avoid highly sweetened or flavoured yogurt because it can change both the sweetness and consistency of the batter.
Do I have to peel the apples?
The apple grated into the batter should preferably be peeled.
The apples used for the rose may be left unpeeled. Red apple skin gives the finished rose a more decorative appearance.
Why did my apple slices break?
The slices were probably too thick or the apple variety was particularly firm.
Slice them more thinly and soften them briefly in the microwave or in a covered saucepan.
Why is my cake wet in the centre?
The cake may be underbaked, the grated apple may have been exceptionally juicy, or the cake tin may have been too small.
Continue baking it under a loose foil cover until the centre is set. Next time, remove a small amount of excess juice from the grated apple and use a 22 cm tin.
Why did the cake become dense?
The most common causes are overmixing after adding the flour, using expired baking powder, or allowing the mixed batter to stand too long before baking.
Place the cake in the oven soon after the baking powder has been incorporated.
Can I prepare the cake in advance?
Yes. The cake can be baked one day before serving.
Store it covered and add the apricot glaze after baking. Bring it to room temperature before serving for the best flavour and texture.
Can I make this cake gluten-free?
A good-quality one-to-one gluten-free baking flour can usually replace the plain flour.
Choose a blend that already contains a binder such as xanthan gum. The texture may be slightly more delicate, so allow the cake to cool completely before slicing.
Can I replace the butter?
The butter can be replaced with 50 ml of neutral-flavoured oil.
The cake will remain moist, although it will have less buttery flavour.
Can I reduce the sugar?
Yes. The batter sugar can be reduced from 50 g to approximately 35–40 g.
The cake will be less sweet, but the structure should remain stable. Keep a small amount of sugar on the apples because it helps them caramelise.
Can I use pears instead of apples?
Yes. Choose firm pears and slice them thinly.
Very ripe pears contain more moisture and can make the centre of the cake wet.
Can I bake the cake in a different tin?
A 20 cm tin will create a deeper cake and may require an additional 5–10 minutes of baking.
A 24 cm tin will produce a thinner cake that may be ready several minutes earlier.
Always test the centre before removing the cake from the oven.
Easy Apple Rose Yogurt Cake
Instructions
- Preheat the oven to 180°C conventional or 160°C fan. Line and grease a 22 cm round cake tin.
- Core the topping apples and cut them into 1–2 mm slices. Toss with lemon juice. Microwave for 45–60 seconds if the slices are too firm to bend.
- Peel, core, and grate the small apple. Gently remove only the excess juice.
- Whisk the eggs and sugar for two minutes, until smooth and lightly foamy.
- Whisk in the cooled melted butter, milk, yogurt, and vanilla.
- Mix the flour, baking powder, and salt in a separate bowl. Fold them into the wet ingredients just until combined.
- Fold in the grated apple. Pour the batter into the prepared tin and smooth the surface.
- Arrange the apple slices in overlapping circles, beginning at the outside edge and working toward the centre.
- Mix the sugar and cinnamon and sprinkle over the apples. Brush lightly with melted butter if desired.
- Bake for 30–35 minutes, until the centre is set and a skewer inserted into the batter comes out clean or with a few moist crumbs.
- Cool in the tin for 15 minutes, then remove and cool for at least another 15 minutes before slicing.
- For the optional glaze, mix the apricot jam with hot water and brush a thin layer over the warm apples.
Notes
- Use firm apples that hold their shape during baking.
- Keep the apple slices very thin so they bend without breaking.
- Do not overmix the batter after adding the flour.
- Insert the testing skewer into the cake batter, not through an apple slice.
- A 20 cm tin may require an additional 5–10 minutes of baking.
- Store covered for one day at room temperature or for three to four days in the refrigerator.