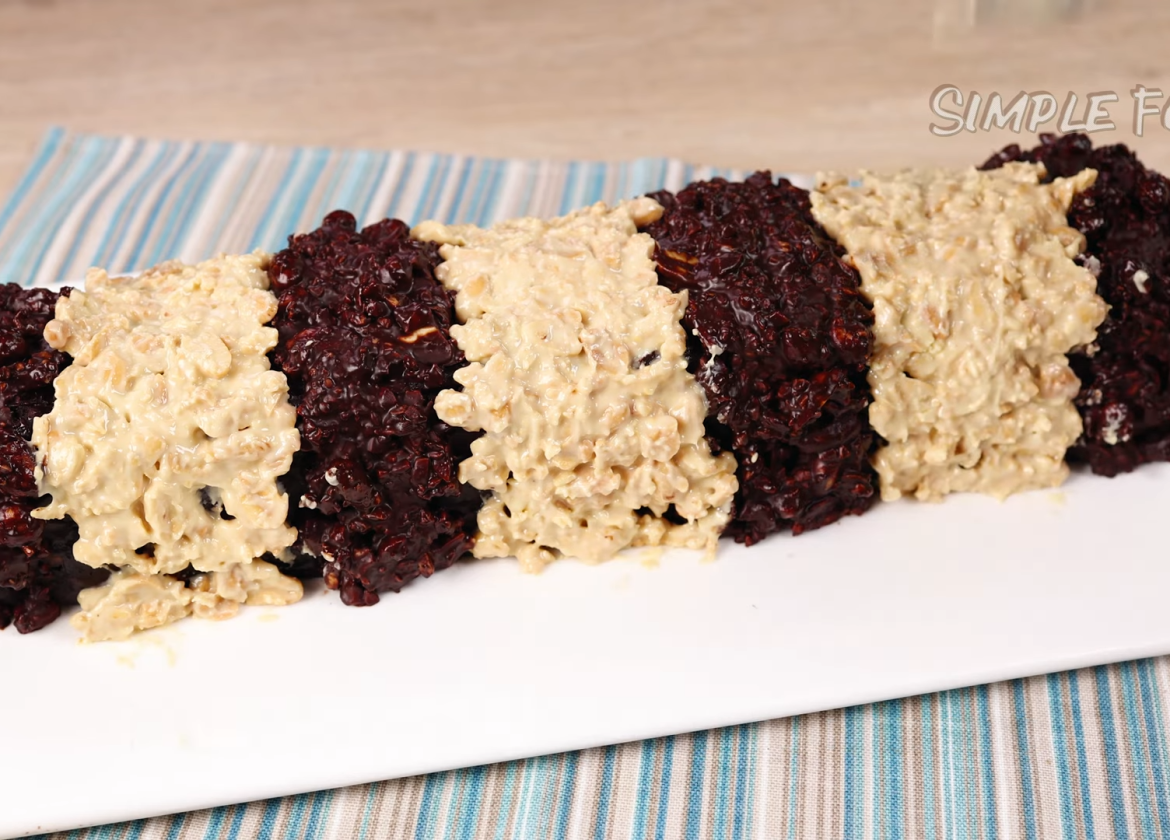
This no bake chocolate dessert is what you make when you want something that looks like a pâtisserie slice but comes together with the calm ease of a home kitchen. Imagine a rich, glossy chocolate base scented with fresh orange zest, wrapped around crunchy biscuit pieces and walnuts so every bite has both silkiness and texture. The mixture starts on the hob with milk, sugar and cocoa powder, which bloom together into a deep, aromatic chocolate sauce that smells like a winter café. Butter is melted in to give the base a velvety mouthfeel, and once it cools slightly, it hugs the crushed biscuits and walnuts like a luxurious chocolate blanket. After a short rest in the fridge, you crown it with a smooth milk chocolate glaze enriched with a little vegetable oil, which helps it slice cleanly and shine beautifully. Roasted peanuts add a salty crunch on top, and a final drizzle of white chocolate gives a striking contrast that makes the dessert look far more complicated than it really is. Even if you have never made a no bake dessert before, this method is straightforward and forgiving, guiding you from saucepan to fridge in clear, simple steps. It is the kind of dessert that waits patiently for you, ready to be sliced whenever guests arrive or a chocolate craving appears. Once you cut the first slice and see the mosaic of biscuits and nuts inside, you will understand why this recipe quickly becomes a house favourite.
🍫 Enjoy A No Bake Chocolate Dessert That Brings Biscuit Crunch, Nutty Bites And Silky Cocoa Richness Together In Every Slice
⏱️ Quick Overview
Prep Time: 25 minutes (including cooling before chilling)
Cook Time: 10 minutes (stovetop chocolate base)
Chilling Time: 1 hour 30 minutes
Total Time: About 2 hours 5 minutes
Servings: 10 slices
Difficulty: Easy
Category: No Bake Dessert / Chocolate Slice
Cuisine: European‑Style Home Dessert
Calories: ~680 kcal per serving
🍊 Savour A Chocolate Orange Treat Where Fresh Zest Lifts Deep Cocoa Flavour Into Something Bright And Elegant
⭐ Why You’ll Love This Recipe
- Completely No Bake: The dessert sets in the fridge, so you avoid the oven entirely and keep the process relaxed.
- Luxurious Chocolate Texture: Milk, cocoa, sugar and butter create a rich, velvety base that feels indulgent in every bite.
- Beautiful Crunch Inside: Biscuits, walnuts and roasted peanuts give contrast and interest, so the texture is never boring.
- Elegant Orange Aroma: Fresh orange zest lifts the chocolate, adding a subtle citrus note that keeps the flavour bright.
- Stunning Layered Finish: A milk chocolate glaze, peanuts and white chocolate drizzle make the dessert look like a bakery showpiece.
- Perfect For Make‑Ahead: It needs chilling time, which means you can prepare it in advance and simply slice when needed.
- Beginner‑Friendly Method: The steps are clear and calm, making this ideal for anyone new to chocolate desserts or no bake recipes.
✨ Choose A Fridge Set Dessert That Looks Like A Pâtisserie Slice Yet Comes Together Calmly In Your Own Kitchen
📅 Nutrition Per Serving (entire recipe, 10 servings)
Approximate nutrition for the whole recipe:
- Calories: ~6,800 kcal
- Protein: ~110 g
- Fat: ~420 g
- Carbohydrates: ~650 g
- Fibre: ~40 g
- Sugars: ~380 g
Per serving (1/10 of the recipe):
- Calories: ~680 kcal
- Protein: ~11 g
- Fat: ~42 g
- Carbohydrates: ~65 g
- Fibre: ~4 g
- Sugars: ~38 g
(Values are approximate and depend on the exact biscuits, chocolate and nuts used.)
🔥 Let Each Bite Deliver Velvet Smooth Chocolate Wrapped Around Crisp Biscuits And Tender Walnuts
👨🍳 DETAILED STEP‑BY‑STEP RECIPE (Chef‑Level Instructions)
Step 1: Prepare The Tin And Ingredients
Line a rectangular or loaf tin with parchment paper, leaving an overhang on the sides so you can lift the dessert out easily later, and measure out all your ingredients before you start cooking.
💡 Having everything weighed and ready keeps the chocolate mixture smooth and prevents it from catching on the bottom of the pan while you search for ingredients.
Step 2: Heat The Milk, Sugar, Orange Zest And Cocoa
Pour the 1¾ cups (400 ml) of milk into a medium saucepan, add the ½ cup (120 g) of sugar, the zest of 1 orange and the ½ cup (60 g) of cocoa powder, then whisk over medium heat until the mixture is smooth and comes just up to a gentle boil.
💡 Whisk constantly, especially around the edges of the pan, to avoid lumps of cocoa and to stop the milk from scorching.
🍫 Make This No Bake Chocolate Orange Biscuit Delight Your Go To Recipe For Effortless Entertaining
Step 3: Add The Butter And Melt It In
Remove the saucepan from the heat, add the 5.3 oz (150 g) of butter to the hot chocolate mixture and stir until the butter is completely melted and the mixture looks glossy and uniform.
💡 Let the residual heat melt the butter slowly rather than boiling again, as this keeps the texture silky and prevents the mixture from splitting.
Step 4: Cool The Chocolate Mixture Slightly
Set the saucepan aside for about 10–15 minutes so the chocolate mixture can cool down to warm rather than hot, stirring occasionally to prevent a skin forming.
💡 Cooling slightly is important; if the mixture is too hot when you add the biscuits, they will turn mushy instead of staying pleasantly chunky.
Enjoy A Topping Of Roasted Peanuts And Milk Chocolate That Adds Crunch, Shine And Pure Indulgence
Step 5: Prepare The Biscuits And Walnuts
While the chocolate mixture is cooling, place the 14 oz (400 g) of biscuits in a large bowl and break them into small pieces with your hands or the back of a spoon, then roughly chop the 1 cup (100 g) of walnuts and add them to the bowl.
💡 Aim for a mix of small and slightly larger pieces; this gives a more interesting texture and a pretty mosaic effect when you slice the dessert.
Step 6: Combine The Chocolate Mixture With Biscuits And Walnuts
Pour the warm chocolate mixture over the crushed biscuits and chopped walnuts, then gently fold everything together until all the biscuit pieces are coated and there are no dry patches.
💡 Work from the bottom of the bowl upwards with a spatula, turning rather than stirring vigorously, so you do not crush the biscuits too finely.
✨ Keep This Dessert Ready In The Fridge For Moments When You Need A Luxurious Chocolate Fix Without Turning On The Oven
Step 7: Press The Mixture Into The Tin And Chill
Transfer the chocolate biscuit mixture into the prepared tin, spread it out evenly and press it down firmly with the back of a spoon or spatula to create a compact, level layer, then place the tin in the fridge for about 1 hour to set.
💡 Pressing firmly is crucial; a tightly packed base will slice cleanly and hold together beautifully when you cut it later.
Step 8: Make The Milk Chocolate Peanut Topping
Once the base has chilled for about an hour, melt the 2.8 oz (80 g) of milk chocolate gently in a heatproof bowl over a pan of barely simmering water or in short bursts in the microwave, then stir in the 25 ml of vegetable oil until smooth and glossy.
💡 Adding oil to the melted chocolate makes the topping easier to slice and gives it a lovely sheen without becoming too hard in the fridge.
🍊 Share Neat Slices And Watch The Mosaic Of Biscuits And Nuts Inside Spark Curiosity And Smiles
Step 9: Spread The Topping And Add Roasted Peanuts
Pour the milk chocolate mixture over the chilled biscuit base and spread it into an even layer, then sprinkle the 2 oz (60 g) of roasted peanuts on top, covering the surface generously, and place the tin back in the fridge while you prepare the white chocolate.
💡 Lightly press the peanuts into the chocolate with your fingertips so they adhere well and do not fall off when you slice the dessert.
Step 10: Drizzle With White Chocolate And Chill Again
Melt the 1.8 oz (50 g) of white chocolate in a clean bowl using the same gentle method, then drizzle it over the peanut‑topped milk chocolate in thin lines or swirls, and return the tin to the fridge for about 30 minutes, or until fully set before slicing and serving.
💡 Use a spoon or a small piping bag for the drizzle; a relaxed, irregular pattern looks elegant and gives each slice a unique finish.
🍫 Choose A Recipe That Proves Simple Pantry Ingredients Can Become A Show Stopping Chocolate Tray
🛒 Ingredients
Chocolate Biscuit Base
• 🥛 1¾ cups (400 ml) milk
• 🍚 ½ cup (120 g) sugar
• 🍊 Zest of 1 orange
• 🍫 ½ cup (60 g) cocoa powder
• 🧈 5.3 oz (150 g) butter
• 🍪 14 oz (400 g) biscuits, broken into pieces
• 🌰 1 cup (100 g) walnuts, roughly chopped
Chocolate And Nut Topping
• 🍫 2.8 oz (80 g) milk chocolate
• 🛢️ 25 ml vegetable oil
• 🥜 2 oz (60 g) roasted peanuts
• 🤍 1.8 oz (50 g) white chocolate
🔥 Let The Combination Of Orange Zest, Cocoa And Butter Create A Base That Feels Both Rich And Perfectly Balanced
🍽️ Kitchen Tools and 🛠️ Equipment Needed 🔪
• 🥣 Medium saucepan — to cook the milk, sugar, orange zest and cocoa mixture
• 🥄 Whisk — to blend the cocoa smoothly into the milk and prevent lumps
• 🧁 Rectangular or loaf tin — to shape and chill the no bake dessert
• 📜 Parchment paper — to line the tin and make lifting out the dessert easy
• 🥣 Large mixing bowl — to hold and mix the biscuit and walnut pieces with the chocolate mixture
• 🔪 Sharp knife — to chop the walnuts and slice the finished dessert neatly
• 🧱 Chopping board — to protect your work surface while chopping nuts
• 🍴 Spoon or silicone spatula — to fold the mixture and press it firmly into the tin
• 🥣 Heatproof bowls — to melt the milk chocolate and white chocolate separately
• 🔥 Hob and, if using, microwave — for gentle melting and heating
✨ Serve It After Dinner With Coffee And Let Its Deep Chocolate Notes Close The Meal Gracefully
❓ FAQ
- What type of biscuits work best for this dessert?
Plain, crisp biscuits such as tea biscuits or digestive‑style biscuits work best because they absorb the chocolate mixture without becoming too heavy. - Can I use dark chocolate instead of milk chocolate for the topping?
Yes, you can use dark chocolate if you prefer a more intense flavour, but the overall taste will be less sweet and slightly more bitter. - Do I have to add the orange zest?
Orange zest adds a lovely citrus note that lifts the chocolate, but you can omit it if you prefer a purely chocolate flavour. - Can I replace the walnuts with another nut?
You can use hazelnuts, almonds or pecans instead of walnuts, as long as you keep the same quantity and chop them roughly. - Is it necessary to add vegetable oil to the melted milk chocolate?
The oil helps keep the topping slightly softer and easier to slice, but you can leave it out if you prefer a firmer chocolate layer. - How long does this dessert need to chill before serving?
It needs at least 1 hour for the base and a further 30 minutes after adding the toppings, but longer chilling will make slicing even easier. - Can I make this dessert a day in advance?
Yes, it is an excellent make‑ahead dessert and can be prepared the day before, then kept in the fridge until you are ready to serve. - How should I store leftovers?
Store any leftover slices in an airtight container in the fridge, where they will keep well for several days. - Can I freeze this no bake chocolate dessert?
You can freeze individual slices wrapped well, then thaw them in the fridge before serving, although the texture of the chocolate topping may change slightly. - How do I get clean slices without cracking the topping?
Use a sharp knife warmed briefly in hot water and dried, then press down in a single motion rather than sawing back and forth.
🍫 Make This Slice Ahead Of Time And Enjoy The Calm Of Knowing Dessert Is Already Waiting In The Fridge
👨🍳 CHEF’S BEST TIPS
💡 Use good‑quality cocoa powder, as its flavour is at the heart of the dessert and will define the chocolate depth.
💡 Grate the orange zest finely so it disperses evenly and gives fragrance without leaving large pieces in the mixture.
💡 Do not rush the cooling step before adding the biscuits; warm, not hot, chocolate mixture is the key to keeping the biscuit pieces distinct.
💡 Choose biscuits that are crisp and dry rather than soft or filled, as fillings can make the base too sweet and heavy.
💡 Toast the walnuts lightly in a dry pan if you like; this deepens their flavour and adds a subtle smokiness to the dessert.
💡 When melting chocolate, keep the heat gentle and avoid letting any water into the bowl, as even a small amount can cause the chocolate to seize.
💡 Press the mixture firmly into the tin, paying attention to the corners, so there are no gaps that could cause crumbling when sliced.
💡 For a neater finish, trim the edges slightly before cutting the main slices, then enjoy those trimmings as the cook’s treat.
💡 If you want very precise portions, mark the top lightly with a knife before cutting to guide your slices.
💡 Serve the dessert slightly chilled but not ice‑cold, as the flavours of chocolate, orange and nuts are more expressive at a gentle cool room temperature.
🍊 Appreciate How A Hint Of Citrus Keeps The Chocolate Flavour Lively Rather Than Heavy
This no bake chocolate orange biscuit delight is the kind of dessert that quietly becomes a signature in your kitchen, because it looks impressive yet asks so little of you. The rich chocolate base, scented with orange and filled with biscuits and walnuts, gives you a satisfying mix of smoothness and crunch in every slice. The milk chocolate glaze, roasted peanuts and white chocolate drizzle turn a simple tray into something that would not look out of place in a smart café. Because it lives in the fridge, it is always ready when you need a little square of comfort after dinner or with a cup of coffee. You can share it generously at gatherings, knowing it slices neatly and travels well, or keep it as a private treat to enjoy over a few quiet days. Each bite reminds you how far simple ingredients can go when you treat them with a bit of care and patience. There is no need for complicated techniques or special equipment, just a saucepan, a tin and a little time in the fridge. Let this dessert show you that indulgence can be calm and unhurried, and that a chilled chocolate slice can carry a lot of warmth. 🍫🍊✨
✨ Choose This No Bake Chocolate Dessert Whenever You Want Maximum Impact With Minimal Effort
📦 SHORT RECIPE
Ingredients:
Milk 1¾ cups (400 ml); sugar ½ cup (120 g); zest of 1 orange; cocoa powder ½ cup (60 g); butter 5.3 oz (150 g); biscuits 14 oz (400 g), broken into pieces; walnuts 1 cup (100 g), roughly chopped; milk chocolate 2.8 oz (80 g); vegetable oil 25 ml; roasted peanuts 2 oz (60 g); white chocolate 1.8 oz (50 g).
Instructions:
Line a rectangular or loaf tin with parchment paper.
In a saucepan, combine the milk, sugar, orange zest and cocoa powder, then cook over medium heat, whisking, until smooth and just boiling.
Remove from the heat, add the butter and stir until fully melted and glossy.
Let the chocolate mixture cool for about 10–15 minutes until warm.
In a large bowl, break the biscuits into small pieces and add the chopped walnuts.
Pour the warm chocolate mixture over the biscuits and walnuts and fold until everything is evenly coated.
Press the mixture firmly into the prepared tin and chill in the fridge for about 1 hour.
Melt the milk chocolate, stir in the vegetable oil, spread over the chilled base and sprinkle with roasted peanuts, pressing them lightly into the chocolate.
Melt the white chocolate and drizzle it over the top, then chill for a further 30 minutes or until fully set.
Lift the dessert out using the parchment, slice into pieces and serve.
Nutrition: ~680 kcal per serving (10 servings).
🍫 Let Every Square Remind You How Satisfying It Is To Break Through A Glossy Chocolate Top Into A Crunchy Centre
No bake chocolate dessert
Instructions
- Line a rectangular or loaf tin with parchment paper.
- In a saucepan, combine the milk, sugar, orange zest and cocoa powder, then cook over medium heat, whisking, until smooth and just boiling.
- Remove from the heat, add the butter and stir until fully melted and glossy.
- Let the chocolate mixture cool for about 10–15 minutes until warm.
- In a large bowl, break the biscuits into small pieces and add the chopped walnuts.
- Pour the warm chocolate mixture over the biscuits and walnuts and fold until everything is evenly coated.
- Press the mixture firmly into the prepared tin and chill in the fridge for about 1 hour.
- Melt the milk chocolate, stir in the vegetable oil, spread over the chilled base and sprinkle with roasted peanuts, pressing them lightly into the chocolate.
- Melt the white chocolate and drizzle it over the top, then chill for a further 30 minutes or until fully set.
- Lift the dessert out using the parchment, slice into pieces and serve.


